Showing posts with label Mayonnaise. Show all posts

Egg White Crêpe/Tortillas & A Chicken Strawberry Wrap#SundayFunday

This Fresh Egg White wraps are filled with juicy grilled chicken, some fresh veggies, Homemade Keto Pasteurized Egg Mayonnaise and not to forget the strawberries!

In keto sometimes you just crave for a wrap, then this for you made with really fresh ingredients, so its super light and refreshing.
Makes 3
Ingredients

3 Large Egg Whites
1 Tablespoon Gelatin powder

Method
In a bowl add the egg white and sprinkle the gelatin on top let it sit for 10 minutes. Use an immersion blender to get the batter smooth and a bit frothy. 
Heat a non stick pan and spray or brush lightly with the oil/cooking fat of your choice. Pour 1/3 of the batter onto your preheated griddle and spread gently with a spatula until the wrap is 5-6 inches across. Be careful not to leave any thin spots. Allow the wraps to cook for 2 minutes or until the edges start to curl up and the bottom becomes lightly brown. Flip and cook for a minute more.  
Repeat with the rest of the batter.

For The Keto Chicken Strawberry Wrap
Ingredients
Lettuce
Grilled Chicken - shredded
Sliced Tomatoes
Sliced Cucumber
Sliced Strawberries
Homemade Keto Pasteurized Egg Mayonnaise
Salt & Pepper to taste

Method
Take a egg white crepe, place lettuce in the center, top it with sliced tomato, cucumber
Then add the grilled chicken and sliced strawberries
Then add some homemade keto pasteurized egg mayonnaise, a dash of salt and pepper to taste.
Wrap it and enjoy!!

You can also check this recipe Keto Tortillas Zero Crab with Egg White Protein Powder
Labels: Egg White Tortillas, Crepes, International Cuisine, Keto, Wraps, Low Carb, Homemade, Sunday Funday, Strawberry, Mayonnaise, Lettuce, Chicken 

Continue Reading
5 comments
Share:

Baby Potatoes In Green Gravy With A Twist#SundayFunday

Palak Paneer or Aloo Palak is mostly prepared in every Indian homes. But this recipe is with a twist and it taste so delicious with some unique ingredients in the gravy. Do try, it's luscious green and so finger licking.
Ingredients
8 - 10 Baby potatoes - boiled and peeled
1 Cup Blanched Palak / Spinach
1 Teaspoon Cumin Seeds
1 Medium Onion - roughly chopped
1 Teaspoon Ginger Garlic Paste
3 Green Chillies
1 Tablespoon Cashew nut pieces
8 Tender Stems of the Palak / Spinach
1 Teaspoon Oil
1 Veg Seasoning Cube
3 Tablespoons Mayonnaise
1 Tablespoon Fresh cream
Oil as required

Method
In a teaspoon of oil fry the stems and cashew nut till the stems have changed color.
Microwave the palak for 2 minutes. Immediately add a tablespoon of oil and half teaspoon sugar to it and mix it. This helps to retain the luscious green color. 
When cooled grind this to a paste along with onion, ginger garlic and green chillies with 2 tablespoons milk.
Make a fine paste.In the pan add sufficient oil to deep fry the potatoes till light golden keep aside. 
In the same pan that the potatoes were fried remove the excess oil and keep 2 tablespoons oil fry the ground onion paste with half cup of water covered with a lid stirring in between till oil leaves the sides. Add potatoes and cover and cook for 5 minutes, add water and seasoning cube. Open the lid add palak and give it a good stir cover and cook for 5 minutes. Taste for salt, add if necessary, now add mayonnaise and switch of the gas. Garnish with cream. 
This Aloo Palak sabzi is delicious on its own. 
Have it with roti , naan , paratha or serve with Yellow Rice which we enjoyed goes well with this.

Labels: Aloo, Baby Potatoes, Palak Leaves, Spinach, Mayonnaise, Main course, Sunday Funday
For our event called Sunday Funday, wherein we share recipes our families will love to enjoy on a Sunday. Our theme for Sunday Funday: " Fresh Garden Harvest".   

Continue Reading
4 comments
Share:

Homemade Pasteurized Egg Mayonnaise - Keto#SuperClubSaturday

This recipe is not mine, so I am only giving the ingredients, watch the video for better understanding and details. Loved this method and idea. Since the egg yolk is pasteurized, it will last for one month in the refrigerator. Do try this recipe, it's a little tricky but worth the effort and after the success of making it, the joy is totally unexplainable! 
Recipe source watch this video to understand the method better. 

Ingredients
3 Tablespoons Water
2 Large Egg Yolks
1 Tablespoon Lemon juice
1 Cup Extra Light Olive Oil
1/2 Teaspoon Salt
1/2 Teaspoon Dijon mustard
1/4 Teaspoon Sweetener - I did no add

Method
The first time I made it, my mayo curdled, since I kept it in the microwave for 40 seconds. I refrigerated it, thinking that it will thicken. But the next day, I found oil floating on top. My mayo had curdled (sorry forgot to take pics). I salvaged it by taking an large egg yolk. Added a tablespoon of water and a teaspoon of lemon juice. Microwaved it for 5 seconds each time for just 17 seconds. Strained the egg mixture, added it to a clean mason jar, pulsed it twice with an immersion blender. Then pulsed the curdled mayo added it in two batches back to egg yolk and ta.. da my super thick pasteurized mayo is ready. Check your microwave heat and would suggest to keep it less time than specified in the video.  
I  did not add sweetener but my mayo is still super delicious.
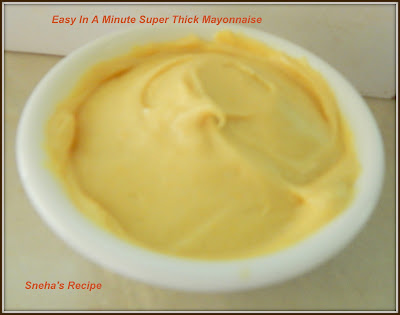
This is a super thick mayonnaise
Labels: 
Preservative free, Mayonnaise, Egg, Pasteurized, Keto, Homemade, Healthy, Super Club Saturday, Dips, Spreads
Welcome to Supper Club Saturday - March 2022 

Continue Reading
1 comment
Share:

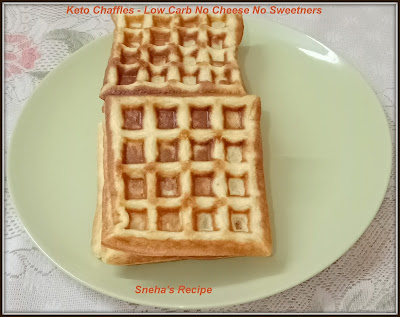
Keto Chaffles - Low Carb No Cheese No Sweetners#PotluckParty

What is a Chaffle?
It’s a waffle made with cheese hence the play on the word waffle starting with a ch instead of a w. There have many variations, all over the internet for Keto chaffle which is also a keto version of a wonder bread. All who follow a Keto/Low Carb diet do not incorporate flour which is high in carbs. Instead of having regular flour bread and other goods, it's always flourless in keto. Flour's made from coconut, almond , cashew, flaxseed, chia seeds ..to make bread's etc.  
Chaffles have overtaken the Keto world by a storm? You will find numerous variations of the same on the internet.. be it Facebook, Google or YouTube, every Keto follower will make their own version to enjoy in their keto diet. When you are on a keto diet, bread, pancake, cakes etc.., are things that one craves for after sometime, so for every normal flour goods you will find a keto replacement.

In my version of Chaffles, I have not used cheese or any type of keto sweeteners. I have used this to make sandwiches...check this recipe here.
If you are following a Keto Diet then this recipe is perfect for you. These are light and delicious. You will not miss Waffles.. that I can assure you. 

You can use chaffles for a Keto hamburger bun, Sloppy Joes, hot dog bun or to make a sandwich. It also make fantastic breakfast sandwiches and a whole lot more as well. 

I have seen many using a Dash mini waffle maker, which is the perfect size for the Chaffle recipe. Since I already have a regular waffle iron, I did not want to invest in buying one just to make Chaffles, might as well use what you already have. 
The best part of making Chaffles is that they freeze very well. They stay good in the freezer for more than a month to three months. These come handy just when you want them. You can reheat them in the waffle maker or microwave or a pop up toaster. I reheat them in my air fryer, they are crisp and fresh to use on reheated. These take just 30-45 seconds to reheat. 

Makes 7 Chaffles
Ingredients

6 Eggs - beaten
1/3 Cup Keto Pasteurized Mayonnaise 
½ Teaspoon Baking powder
2 Tablespoons Coconut flour
½ Teaspoon Salt to taste Seasonings of your choice!
¼ Teaspoon Garlic Powder
¼ Teaspoon Onion Powder
¼ Teaspoon Cinnamon powder

Method
Whisk the eggs well, then add in the mayonnaise and whisk until well combined, then add in baking powder, coconut flour and mix well. Then goes in all the seasonings, like salt, black pepper powder, onion , garlic and thyme powder. Can add whatever other seasonings of your choice.
Heat the waffle maker and when heat, grease the waffle iron with olive oil or butter. Pour the batter ( do not overfill or will the overflow and it will messy to clean). Fill all the gaps/holes and close the waffle maker.
It takes about 3 - 4 minutes for the chaffle to reach a golden brown color ( depending on the waffle make). Once it is done, it should be easy to remove from the waffle maker.
Don't have a waffle maker, or do not wish to make chaffles then use the same batter and make pancakes using a non stick pan.
These are light and delicious.

Macros for 2 Chaffles: Without butter: Cal 218, Net Carbs 2 Fiber 1, Fat 20, Protein 8.
Labels: Keto, Chaffles, Waffles, Mayonnaise, Egg, Coconut Flour, Low Carb,Garlic Salt, Onion Powder, Cinnamon, Potluck Party, International CuisineSue of Palatable Pastime invites us each month to join her in a Potluck Party. No themes, no rules just bring a dish and share it. Let's see what the other's brought to this Party.
Keto Chaffles - Low Carb No Cheese No Sweetners from Sneha’s Recipe
Almond Butter Chicken from A Day in the Life on the Farm
Easy Spring Dessert Board from Magical Ingredients
Cauliflower Pizza from Patyco Candybar
Cold Soba Noodles from Palatable Pastime

NUTRITIONAL DISCLAIMER
Please note that I am not a medical or nutritional professional. I am simply recounting and sharing my own experiences on this blog. Nothing I express here should be taken as medical advice and you should consult with your doctor before starting any diet or exercise program. I provide nutritional information for my recipes simply as a courtesy to my readers. It is calculated using https://www.myfitnesspal.com
.

Continue Reading
3 comments
Share:

Pulled Chicken & Celery Sandwiches#SundayFunday

Pulled Chicken & Celery Sandwiches are delicious and filling. A perfect meal to carry for your office lunch or kids school lunch box, serve these as party pleasers. What I love about sandwiches that they are shelf stable for at least 4 -5 day's in the refrigerator. Prepare them in advance and enjoy whenever you are hungry. For this you can use any leftover chicken.
Ingredients
4 - 6 Big Slices White Sandwich Bread
1 Cup Pulled Leftover Chicken
½ Cup Grated Cabbage
1 Carrot- grated
2 Tablespoons Finely Chopped Celery With Leaves
2 Tablespoons Finely Chopped Salad Leaves
1 Tablespoon Chopped Pickled Jalapenos
1 Tablespoon Chopped Pickled Gherkins
1 Tablespoon Sriracha Sauce
½ Cup Mayonnaise
3 Tablespoons Grated Cheese
Butter as required

Method
In a bowl add mayonnaise, cheese, Sriracha sauce mix well to combine, then add in the chopped cabbage, carrot, jalapenos, gherkins , finely chopped celery with leaves, salad leaves , and pulled chicken mix well, Sandwich filling is ready .

Butter both the sides of the bread.
In one slice of bread , place 2 -3 tablespoons of the prepared filling and press to level it well.
Cover it with a another slice of bread. Like wise prepare the rest of the sandwiches and cling wrap them well. Refrigerate it for at least 3 -4 hours.
then trim the sides and cut into small triangles. 
Serve, Enjoy!!
Labels: Chicken, Burger , Cheese, Cabbage, Carrot, Celery, Salad Leaves, Sriracha Sauce, Kids delight, Dinner, Sandwiches, Mayonnaise, Bread Slices
For our event called Sunday Funday, wherein we share recipes our families will love to enjoy on a Sunday. Our host for this week's event our host, is Wendy of A Day in the Life on the Farm.   

Continue Reading
4 comments
Share:

Easy In A Minute Super Thick Mayonnaise#SuperClubSaturday

This super thick mayonnaise is made in one minute! Thick, creamy and super easy to make, homemade mayonnaise is delicious. This recipe is no fail recipe! The color is yellow because I used American mustard paste, there is no difference in taste.

Ingredients
¾ Cup Extra Light Olive Oil
1 Egg Yolk
2 Teaspoons Dijon mustard - I used American Mustard
1½ Teaspoon Apple Cider Vinegar
½ Teaspoon Level Lemon Juice
¼ Teaspoon Sea Salt or to taste

Method

Place the ingredients into a pint-sized, wide-mouth mason jar. Insert the immersion blender all the way to the bottom of the jar. Start blending and leave the blender at the bottom for 10-20 seconds, allowing the mixture to start emulsifying.   
Once the ingredients are incorporated you see it thicken at the bottom then keep processing immersion blender pulling it up and down until completely blended.  
Use a spatula to stir the mayo vigorously after blending to smooth it out.   
Store in the fridge for 4-5 days.
My Notes
If you like a strong mustard taste then increase it by ½ teaspoon.
Labels: Super Club Saturday, Mayonnaise, Jams & Sauces, Salad, Sandwiches, Homemade  
Welcome to Supper Club Saturday #2 (February 2022)  

Continue Reading
3 comments
Share:

Vegetarian Omurice /Japanese Fried Rice Omelette#EattheWorld

Omurice, it's a Japanese invention that combines an omelette with fried rice. You'll often hear it referred to as omuraisu, omumeshi or omuretsu" and "raisu," the Japanese pronunciations of "omelette" and "rice" Some versions have the rice rolled up in the omelette
I'm also sharing here, a traditional Capsicum Ketchup, since it's easy and tasty, while the recipe calls for Okonomiyaki Sauce.
Japanese Omurice is made with chicken, but Koreans commonly use beef, pork or ham as well. Shrimp is another good option.
I have used vegetables, like carrot, onion, and scallion. You can also add  celery, zucchini, or mushrooms. 

I used 2 eggs per serving for this recipe, but you can use 3 if you want a thick omelette covering your rice. You can also add a little bit of heavy cream or milk for a softer omelette, but I didn’t include it in this recipe. This is an easy fried rice flavored with sweet, tangy ketchup and wrapped in an egg omelette.
Serves 2
Ingredients

1 Medium Onion - finely chopped
1 Scallion - finely chopped
1 Small Carrot - finely chopped
½ Teaspoon Black pepper powder
1 Tablespoon Soy sauce
3 Tablespoons Capsicum Ketchup - recipe below
½ Teaspoon Salt
2 Tablespoons Oil or as required for pan frying
2 Cups Heaped Cooked Cold Rice -
4 Eggs
To Make the Kewpie Mayonnaise
1 Cup Mayonnaise
¼ Teaspoon Garlic powder
2 Teaspoons Tomato Ketchup

Method
Prepare the fried rice ingredients by finely chopping all the veggies.
Heat a large skillet over medium high heat f oil. Add the onion, scallion, carrot and stir fry until the onion turns soft. Stir in soy sauce, salt and pepper to taste.

Reduce the heat to medium. Add the rice, and stir well until the clumped up rice is broken up and all the ingredients are well combined. Add capsicum ketchup (adjust to taste), salt and pepper to taste, continue to stir until the ketchup is evenly incorporated into the fried rice. Keep this aside.  

Heat a lightly oiled small non-stick pan over medium low heat.

Crack and beat 2 eggs in a bowl with a spoon or a fork. Stir in a pinch of salt. Add the egg mixture to the pan and swirl it around to cover the pan.

When the bottom is set but the top is still runny, turn off the heat and add one serving of the fried rice in the middle of the egg omelette.  Using a spatula, fold both sides of the omelette over the rice. Push the whole Omurice to the side of the pan.
Flip it onto a plate. Top it off with a squeeze of ketchup or Kewpie mayo. It's ready to enjoy.

Capsicum Ketchup
Ingredients
1 Tablespoon Olive Oil
1 Medium Onion - finely chopped
1 Large Red Capsicum - roasted
200Ml Tomato Puree
4 Ripe Tomatoes - chopped
¼ Cup Apple Cider Vinegar
1 Stalk Celery - chopped
1" Piece Ginger - chopped
4 Cloves Garlic - chopped
¼ Cup Dark Brown Sugar
2 Teaspoons Honey
1 Teaspoon Salt
½ Teaspoon Coriander powder
¼ Teaspoon Nutmeg Powder
¼ Teaspoon White Pepper

Method
Roast the capsicum in a preheated oven at 180°C for 15 minutes or until the skin start to blacken or on the gas flame. Wrap the capsicum, in aluminum foil, fold over the edges to seal and trapped steam which will help loosen the skin from the capsicum. Once cooled, peel the skin off, de seed it and roughly chop them.
Add the olive oil to a pan and sauté the onions, celery, ginger, and garlic until they are just starting to turn brown around the edges. Add the capsicum, dark brown sugar. Cook, stirring until the sugar has melted. Add the chopped tomato, vinegar, tomato puree and salt, Gently simmer over low heat, stirring regularly. Once the softens and the sauce starts to thicken, switch off the flame. Allow the mixture to cool. 
Add the cooled mixture to a food processor or blender and process until smooth. 
I wanted the ketchup smooth, so passed the blended mixture through a fine sieve and discarded the solids. Now add the sauce back into the pan, add in the honey, coriander, nutmeg and white pepper powder. Give this a good mix and bring this to a boil, reduce the flame and it simmer till it form a thick sauce consistency, switch off the flame, cool. 
Capsicum Ketchup is ready.
You can freeze the remaining in an airtight container for 2 - 3 months.

My Notes
If the rice is a bit too hard after being in the fridge, heat it up in the microwave to soften it a little.
You can also shape the Omurice by hand using aluminum foil or a paper towel. Drizzle some ketchup on top. Repeat the last 3 steps for another serving.
Labels: Omurice, Japanese, Asian Cuisine, Vegetarian, Egg, Kwepie, Mayonnaise, Capsicum, Ketchup, Homemade, Eat the World
                   
Each month a group of us join Evelyne of CulturEatz as she travels to different countries to Eat the World. This month it's secret Santa wherein we can choose any dish by the blog assigned to us.  
Check out all the wonderful Japanese dishes prepared by fellow Eat the World members and share with #eattheworld. Click here to find out how to join and have fun exploring a country a month in the kitchen with us! 
 Amy’s Cooking Adventures: Yoshinoya Beef Bowl (Gyudon) 
A Day in the Life on the Farm: Japanese Rice 
Pandemonium Noshery: Ginger Pork Stir Fry 

Continue Reading
3 comments
Share: