Rice With Chorizo - A Spanish Recipe


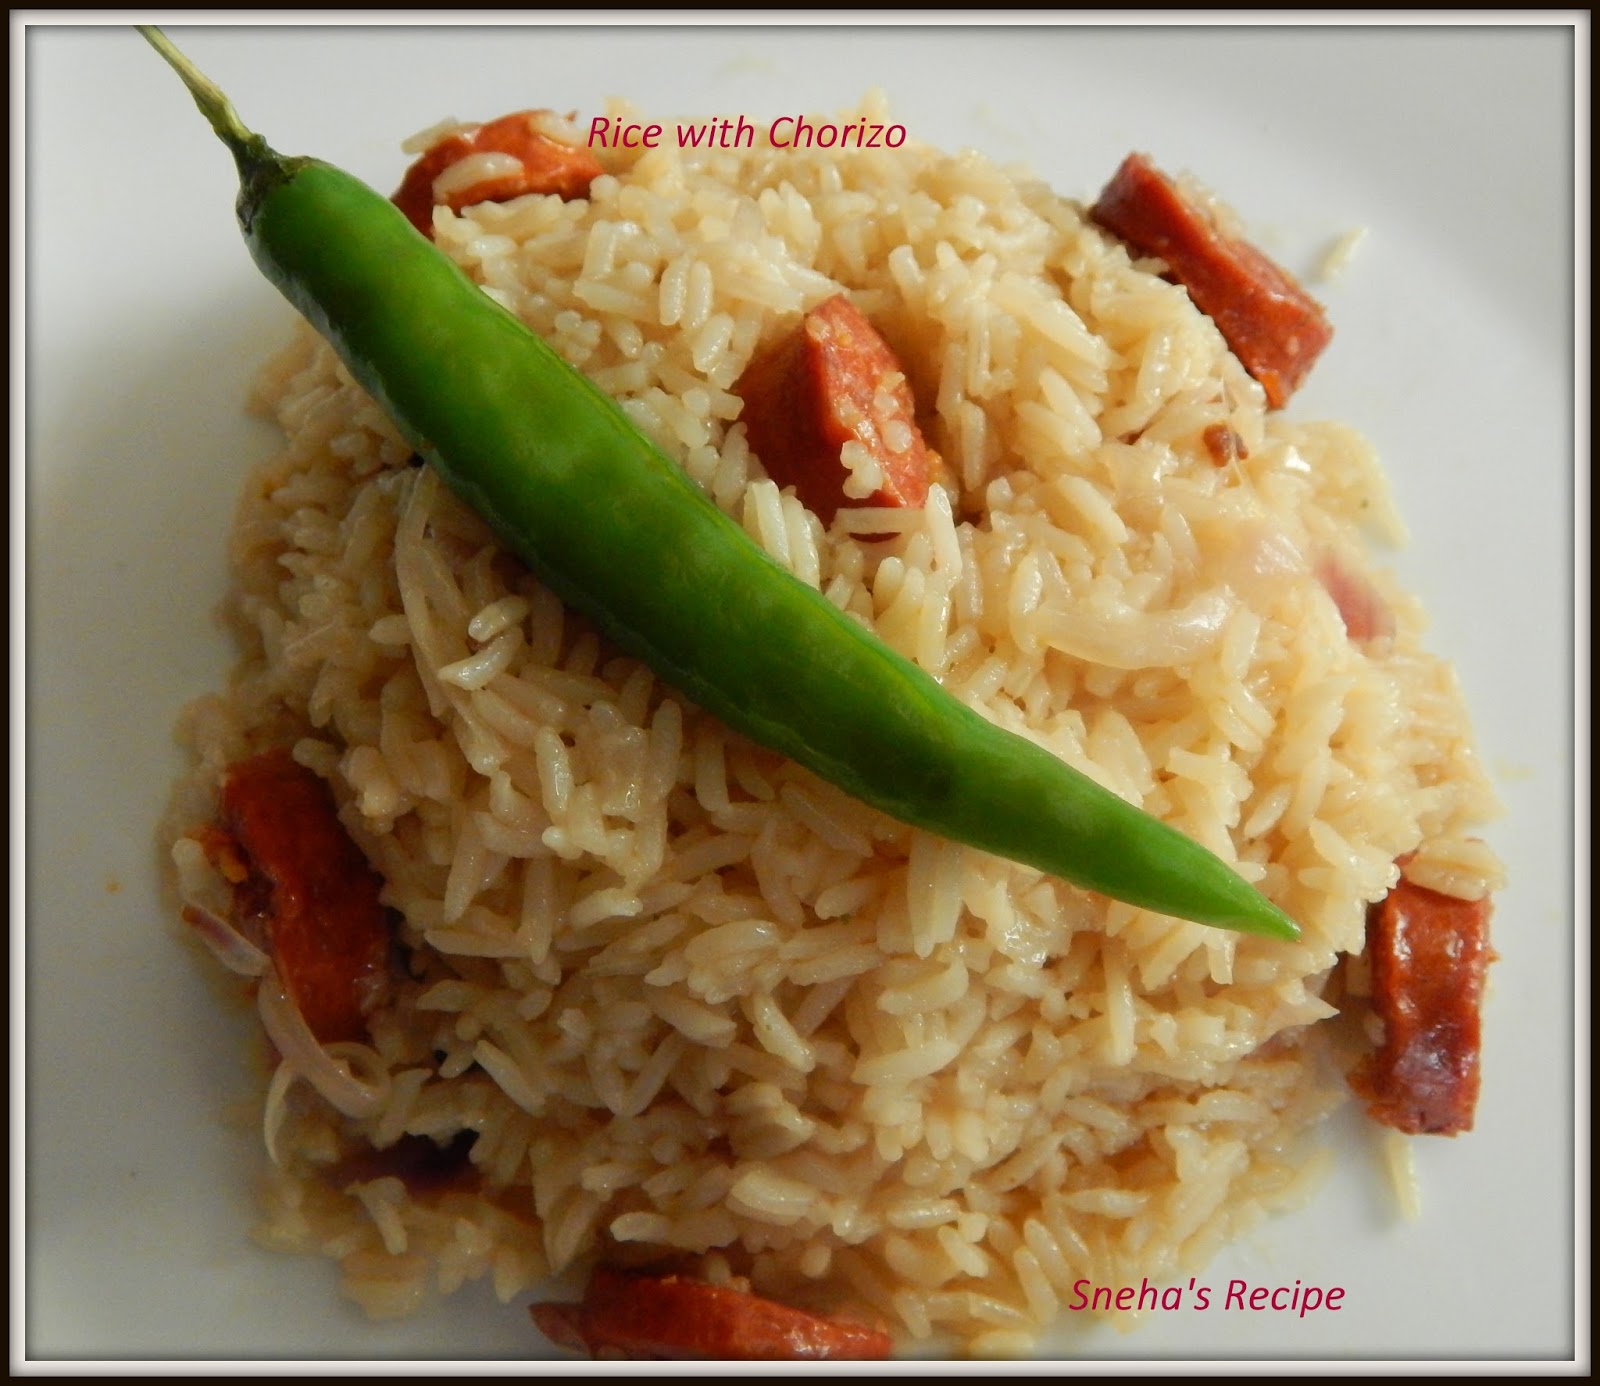
My daughter picked two types of Chorizo , one a sausage and the other a salami type from Spain.  I had seen Nigella Lawson prepare this on her cookery show,  always wanted to make it and see what it taste like.  When my daughter brought this I was so excited, waited for an opportunity to prepare.  This is something that only I eat, so had to wait a very long time to prepare it. 

I finally prepared this rice which is very quick and easy. This is so savory and warming. It's not too spicy for kids. A deliciously simple and yet very tasty Spanish dish.

Chorizo is a dry/cured sausage that is found in every local bar and household in Spain. The taste is amazing. In Spain, they sell different varieties of Chorizo. Some that can be cut into thin slices and eaten in sandwiches and other varieties that are meant to be used for cooking in stews. This is real comfort food. No planning and yet tasty and easy.

Serves 2


Ingredients 


1 Chorizo Sausage
2 tablespoons Olive oil
1 Onion - finely diced
1 Cup Rice
2.1/2 Cups Boiling Water
1 Chicken seasoning cube
½ teaspoon Paprika
1/4 teaspoon Salt
1 bay leaf
1/2 Teaspoon Peppercorns


Method

Slice the chorizo into thick roundles.

Heat the oil in a saucepan and gently cook the onion for five minutes until it is softened. Add the chorizo and fry until it give out the awesome red colour. Add the rice and  fry for about 3 minutes, stirring well to coat the grains.

Add the boiling water, chicken cube. paprika, salt, pepper, and bay leaf, and bring to the boil. Simmer for  15 - 20 minutes, lightly stirring in between , until the rice is cooked and has absorbed  all the liquid.   Serve hot


Super Easy! No dicing of vegetables needed!!  I enjoyed this for my lunch. Hmm..mm I must say it looked just like what Nigella Lawson makes... yum..

Labels : Rice, Continental Cuisine, Spain, Chorizo, CCChallenge  

Continue Reading
5 comments
Share:

Apple Walnut Sandwich


We all crave  for a good sandwich. My hubby was travelling with his friend and their kids, he wanted to me prepare sandwiches for them. 

When I was preparing them, he tells me, Do you think the kids will like these sandwiches ? I did not reply, just packed them in a box and gave him. 

The next day when he returns he give me the empty box and smiles, they were delicious and the kids loved them.


Sometimes you need to break away from the traditional ingredients and think outside the box….and when you do that, this is what happens! This combination of sweet, crunchy, will make you forget all about those other sandwiches you have eaten.

Sending this post to Srivalli's Kid's Delight event, host of the month Harini - theme Fruits in any form week 4 day 3.

Ingredients


16 Slices Bread
3 Red Apples - cored and grated
1/4 Cup Walnuts - toasted and roughly crushed
2 Tablespoon Coriander leaves - chopped
1/2 Cup Mayonnaise

Method


Mix the apples, walnuts, and coriander into the mayonnaise. 


Spread it on a slice of bread, cover with another slice of bread.  Cut them in triangles and place them in a box .

Labels : Sandwiches, Apple, Walnuts, Kids delight, Blogging Marathon

Continue Reading
14 comments
Share:

Apple and Watermelon Crush


Watermelon And Apple Cooler is a perfect summer drink to beat the heat. This easy-to-make and flavorful mocktail will definitely cool you down.
Sending this post to Srivalli's Kid's Delight event, host of the month Harini - theme Fruits in any form week 4 day 2.
Ingredients 
4 Cups Watermelon  - seeded and cubed
3 Tablespoons Powdered Sugar
Rock Salt to taste (Sendha Namak)
1 tsp Cumin Seeds - roasted and crushed
1 tbsp Fresh Mint Leaves (chopped)
1 Big Apple -  grated
Crushed Ice as required

Method


In a blender, blend together watermelon, powdered sugar and rock salt until done.

Pour the blend in a jar and add crushed cumin seeds, chopped mint and crushed ice and mix well.

Add the grated apple to the watermelon juice.

Stir and pour into individual glasses. Serve , garnished with mint leaves. 


Serve chilled.  Quench your thirst with this refreshing drink.


Check out the Blogging Marathon page for the other Blogging Marathoners doing BM#53.


Labels : Watermelon, Apple, Juices, Mocktail, Kids delight, Blogging Marathon

Continue Reading
16 comments
Share:

Pomegranate Souffle - Eggless with homemade evaporated milk


Pomegranate, organic name punicagranatum, is a juicy fruit. It is also known as a super fruit . In addition to antioxidants, pomegranates are a source of fibre, B vitamins, vitamin C, vitamin K and potassium. One pomegranate supplies one-quarter of a day's worth of folate and one-third of your daily vitamin C.

My kids love pomegranates, give it to them in a bowl with a spoon and they will happily eat it.  When I made this souffle and served my kids they were so happy and polished it in few minutes. 

Sending this post to Srivalli's Kid's Delight event, host of the month Harini - theme Fruits in any form week 4 day 1.
Ingredients

1 Cup Pomegranate Juice - Freshly made
400 ML Can Evaporated Milk - Homemade
90 Grams Strawberry or Raspberry Jelly Crystals
1 Cup Whipping Cream
1 Tablespoon Gelatine - soaked
1/4 Cup Water
4 Level Tablespoon Sugar

Method


Soak the gelatin in water and keep aside for 10 minutes then on slow flame heat it till fully dissolved, keep aside.

Over medium flame dissolve the strawberry jelly in the pomegranate juice,  when dissolved add the gelatine mix,  mix well then switch off the flame . Keep it to cool to room temperature.

In a blender add the evaporated milk then add the sugar and beat well till fluffy then add the gelatine mix and blend again then add whipping cream and blend again then put this in a jelly mold and keep to set in the fridge. ( I set these in disposable molds  for the kids).  Sprinkle few pomegranate seeds and whipped cream.   Enjoy ...

My Notes:

Do not bring the gelatine to a boiling point,  when it dissolves  immediately bring down from flame.

See that the gelatine mix is cooled completely before you add it to the evaporated milk or else the milk will curdle and the mix will go to waste.


Lables : Sweets & Desserts, Kids delight, Blogging Marathon, Pomegranate, Eggless 

Continue Reading
17 comments
Share:

Spaghetti Fritters


Spaghetti Fritters is a fried pasta dish,  T
his recipe if from Jamie Oliver cook book.   This dish can be altered to suit what you like, you can vary the flavor in different ways, by adding ingredients of your choice. The fritters should be soft in the middle and crunchy on the outside. 

These pan fried spaghetti fritters are very simple to make and taste absolutely delicious.  You can make these of leftover pasta too.


This is the third recipe under the theme Bring on the Fritters.

Ingredients
2 Cups Boiled Spaghetti 
4 Eggs
1 Teaspoon Chicken Soup powder
1/4 Teaspoon Fresh Dill - finely chopped
1/2 Teaspoon Parsely - finely chopped
1/2 Teaspoon fresh Thyme
1/2 Teaspoon Sumac
1/4 Teaspoon Pepper powder
Salt to taste 
1/2 Cup Cheddar Cheese - grated
1/4 Cup Parmesan cheese powder
Butter + Oil for frying


Method 

Crack eggs in a bowl and whisk. Then, add sumac, dill, parsley, thyme, pepper powder, salt to taste, both the cheese, chicken powder and mix.  Add pasta to the bowl and give it a mix using a fork.
Pour two tablespoons of oil + butter in a pan and heat it.
Using a fork or a tong, take little bit of the spaghetti mixture and drop it to the hot pan. Fry it at a medium heat for about 2 minutes on each side.  Serve with sriracha sauce.


Check out the Blogging Marathon page for the other Blogging Marathoners doing BM#52.

Linking this to Valli's 'Cooking from Cookbook Challenge: June -- Week 3.


Labels : Breakfast, Fritters, Spaghetti, Blogging Marathon, CCChallenge

Continue Reading
17 comments
Share:

Turon - Banana Fritters with Homemade Spring Roll Wrappers


As per wiki , Turon (Philippine Spanish: turón de banana or turón plátano), also known as lumpiyang saging (Tagalog, banana lumpia), is a Filipino snack made of bananas or of jackfruit, or both rolled in a spring roll wrapper and fried. Other fillings can also be used, including sweet potato, mango, cheddar cheese and coconut.

Turón is a popular street food amongst Filipinos. These easy to do banana fritters in wrappers are a favorite of most Filipino households for a merienda snack or a dessert. These are best served warm.

Second recipe for this week BM -- under the theme --Bring on the Fritters.
Ingredients

5 Bananas - ripened, peeled, sliced in half, lengthwise
10 Spring roll wrappers - see recipe below
1 Cup Brown Sugar
Oil for frying

Method
Roll each banana slice in the brown sugar and keep aside.

Heat oil in a pan on slow flame.


On a dry surface, place the wrappers. 


Place the banana slice in the middle of the wrapper.


Brush the edges all around with water to seal.


Tuck in the edges on the left and right.

 
Roll it in a long cylinder. 

When oil is hot enough, add two of the wrapped turon. Rotate the wraps or lumpia around the pan for even cooking. Cook the turon for about 3 to 5 minutes on each side or till they turn a golden brown. Drain on paper towel or parchment paper to remove excess oil. Serve hot.

Spring Roll Wrappers

Ingredients

1 Cup Flour
1/4 Teaspoon Salt
Water for kneading 

Method 

Sift flour into a medium bowl and make a well in the center. Add cold water in well. Knead lightly until a smooth dough has formed. On a lightly floured surface, roll the dough into a big roti. Cut into squares ( bigger than the length of the banana.

My Notes:
Use brown sugar because it does not burn like granulated sugar does when cooking.


Labels:
Banana, Fritters, Breakfast, Blogging Marathon, Philippine, Spring roll wrapper 

Continue Reading
14 comments
Share:

Roasted Corn Fritters


According to wiki, 'Corn fritters' are a traditional savory Southern USA snack. They can be deep fried, shallow fried or baked. These fritters are so easy, quick and they make a delicious snack.

My first for the this recipe for this week BM -- under the theme --Bring on the Fritters.

Ingredients
1 1/2 Cups Corn kernels
1/4 Cup Spring  onion -  finely chopped
1/4 Cup Capsicum - finely chopped
1 Tablespoons Jalapeno  - finely chopped
2 Tablespoon Corinader leaves  - 
chopped
2  Eggs  - beaten

1/3 to 1/2 cup flour
2 Red Chillies  - finely chopped
1/2 Teaspoon garlic powder 
Salt to taste
1/2 Teaspoon Sugar
Oil for frying

Method
Place  the corn kernels on a hot pan with a a teaspoon of oil  and roast until caramelized.  Remove and cool.

In a bowl combine roasted corn, green onion, capsicum, jalapeno and coriander, red chillies. Stir in beaten eggs. Add 1/3 cup flour and stir. Add only as much flour is needed to hold ingredients together, say  up to 1/2 cup. Season with garlic powder and salt. Add sugar. 

Heat  oil in a pan.  Drop spoonfuls of batter to make fritters. Cook slowly over medium heat until golden brown, crisp and cooked through.   Drain on  a paper towel. Serve piping hot with sour cream. 


Labels: Corn, Fritters, Breakfast, Blogging Marathon

Continue Reading
17 comments
Share:

Bombil Chinchoni Without Coconut And Oil

What differentiates East Indian food from other Indian cuisines, is its use of masala. The Bottle Masala, which forms the basis of most East Indian preparations, is made up of 36 ingredients, which are hand-pounded to give the food a unique taste. This Chinchoni is mostly made in Mother's house and is a traditional recipe, sometimes with coconut or without,  with a single type or fish or mix of different fish. 

This is without coconut and oil. In this recipe the 'chinch' or the sourness comes from tamarind.  This is tangy and lightly spicy curry.  This can be had with steamed rice or Hand Breads (Apas) -East Indian.

Ingredients

8 Bombils -  or any fish
500 ml water
1 Teaspoon Salt
2 Teaspoons Tamarind paste

For the Masala

5 - 6 Dried Red Kashmiri chillies
4  Garlic flakes - roughly chopped
Teaspoon Cumin seeds
1/2 Teaspoon Turmeric powder
2 Teaspoons Rice - washed

Method 
Soak red chillies in hot water for 1 hour. Drain and grind with remaining masala ingredients to a smooth consistency, gradually adding 3-4 tablespoons of water,or as required.

Wash fish and set aside to drain. 
In a pan or mud vessel (which we East Indians call it a treezal), add the ground masala, tamarind paste, water and over low flame, let this boil for 10 to 15 minutes.   Adjust the consistency of the gravy and sourness accordingly, then only add the fish. After 15 minutes add fish and bring to a boil, lower heat and simmer for 4 - 5 minutes. Serve hot with steamed rice.
My Notes
You can add any fish  or a mix of two or three different types of fish.  
Labels : Chinchoni, East Indian, Seafood/Fish, Curry, Oil Free, Tamarind, Main course, Bombils, Bombay Duck

Continue Reading
3 comments
Share:

One Bite Sandwich


These sandwiches are good when children are playing or watching tv.  Keep a plate full of these with ketchup and they will vanish in minutes.  These can be packed as tiffin or served as party pleasers. 

Ingredients
8 Bread Slices
1 Cup Boiled Sweet Corn - crushed
1 Small Onion - finely chopped
1/2 Teaspoon Black pepper powder
Salt to taste
1.1/2 Tablespoon Cornflour
1/2 Cup Water
Butter as required
Cheese as required

Method


Trim the sides of the bread and with a rolling pin flatten it lightly. Keep aside.


In a bowl mix together water, a pinch of salt and cornflour to a thin paste,  keep aside.

Heat a pan add a teaspoon of butter, onions and fry till translucent.  Add the sweet corn, pepper powder and salt to taste.  Stir fry  for a minute add a teaspoon of cornflour paste and fry till it comes together.  Remove and cool.


To assemble

Keep a griddle / tawa on low flame to heat.


On a rolled slices of bread, sprinkle little cornflour paste till bread is lightly moist.  


Place the filling, sprinkle grated cheese,   cover it with another moist bread slice.  


Apply butter on the top of the bread.  


Place buttered side down on the tawa and press with a spatula lightly for a minute only,  apply butter on this side too and flip it  press again for a minute and remove on to a plate.  Cut and serve with kethcup.


My  Note :

Do not toast the sandwich to brown it or make it crisp. 

Sending this post to Srivalli's Kid's Delight event, host of the month Sandhya - theme Snacking all the way week 2 day 3.

Check out the Blogging Marathon page for the other Blogging Marathoners doing BM#52.


Lables : Sandwiches, Corn, Cheese, Kids delight, Blogging Marathon

Continue Reading
19 comments
Share:

Stuffed Idli Suprise


Have leftover idlis and your kid is bored having the it, then you should try this recipe.  My kid loves this, am sure your's too will love it.  This an easy way to hide veggies and give it to them.  Top it with their favorite -- cheese and they have it without fuss.  So let's go to the recipe.

Sending this post to Srivalli's Kid's Delight event, host of the month Sandhya - theme Snacking all the way week 2 day 2.

Ingredients
1 Kg Idli Batter
2 Tablespoons Onions - finely chopped
1.1/2 Tablespoons Oil
2 Teaspoons Ginger - Garlic paste
1/2 Teaspoon Chilly paste
1/2 Cup Palak - finely chopped
2 Tomatoes - grated
1 Teaspoon Chilly powder
2 Teaspoon Garam Masala powder
1.1/2 Tablespoons Cashewnut powder
2 Teaspoon water
2 Tablespoons Capsicum - finely chopped
50 Grams Paneer - grated
2 Tablespoon Coriander leaves - chopped
Cheese as required for granishing
Salt to taste
Oil for deep frying

Method

Steam the idlis in a katori. When steamed and cooled then scoop out the center to make a well in the centre (see pic).


Deep fry the idlis on high flame till light golden in color. Keep them on a paper towel to drain.


For the stuffing
Heat oil in kadai / wok add the onions and ginger garlic paste fry till onions are light pink . Add the chilly paste, palak , grated tomatoes and fry well then add the cahewnut powder, chilly powder, garam masala, salt to taste and water, fry till the masala is cooked and the gravy is thick. Then add the capsicum and paneer, stir fry for a minute. Take off flame add the coriander leaves.

To assemble
Take each idli,  add the stuffing in the well and top it with grated cheese.   Serve.


Check out the Blogging Marathon page for the other Blogging Marathoners doing BM#53.

Labels : Idli, South Indian, Kids delight, Blogging Marathon, Cheese

Continue Reading
16 comments
Share:

Makrout - Moroccan Date Cookie


This delicious moroccan pastry is made with semolina and date . 

Makrout in it's various forms is present on all celebration tables especially
during Ramadan .  Makrout, also spelled Maqrout, Makroudh, Maqrut, Mqaret, Imqaret or Makroud. The word makrout in arabic means "diamond shaped" as these small delights are traditional diamond shaped.

This pastry has so much of ghee and oil that while making it I had a tough time.  The heat in Mumbai is so much that the pastry was melting.   Had to keep it in the fridge to set after every rolling.  But the end result was fantastic.  We enjoyed it, even my friends loved this cookie.  A healthy and tasty cookies.  Do try it.

Ingredients
For the dough
1 Cups  Fine Semolina

1 Tablespoon All purpose flour
2 Tablespoons Rose water
1. 1/2 Tablespoon Ghee
1. 1/2 Tablespoon Oil
1 Tablespoon Sugar
A pinch of salt

Ingredients for the filling
1.1/2 Cups of Pitted Dates
1 Tablespoon Rose water
1 Tablespoon Butter
1/4 Teaspoon Cinnamon powder
a pinch of ground nutmeg

Honey

Method
To make the dough


Melt ghee, when melted, add the oil.


Mix the semolina, flour, sugar and salt.  Slowly add the melted ghee mixing thoroughly. Add water just enough to wet the semolina.  Keep it aside covered overnight.  Next day grind the semolina  to paste without adding any water.


Knead this into a soft ball/ very smooth texture. Keep it in the refrigerator for an hour to set.  


To assemble

Transfer the dough on to a flat surface, divide the dough into two parts. 


Roll out one part into a small thick chappati and place the date paste over it. Cover it with the other part of the dough.


Roll this in a thick chappatti.  Cut with a square cookies cutter.


I used a small mould to decorate the makrouts.


I din't fry them in oil, but baked them in the oven. Place this on to lined  baking tray . 


Bake in a pre-heated oven at 180 degrees for 25 - 30 minutes till light golden on top.  


Dip it in honey immediately after you remove it from the oven.  Keep it to drain.  Serve, enjoy .... 

This recipe goes to 
Mena's Cooking Club.


Labels : Dates, Honey, Semolina, Moroccan, Biscuits & Cookies, Mena Cooking Club, Continental Cuisine


Continue Reading
4 comments
Share: