Showing posts with label Multi Cooker Monday. Show all posts

Tomato Egg Pulao - Pressure Cooker#MulticookerMonday

Easy meals are always a blessing when you have so many other chores to complete in the morning, with children leaving for school, hubby and me getting ready for work. Preparing a lunch box is definitely a difficult task for a working mom especially if your child is a picky eater. I always try to pack healthy lunch boxes for our meal. Here is one protein rich, quick and healthy meal.
1 Cup Measurement = 250 Ml
Serves 2 - 3 
Ingredients
 
1 Cup Heaped Basmati Rice
1 Medium Onion - chopped
1 Big Cube Vegetable Seasoning
2 - 3 Tablespoons Oil
1 Teaspoon Meat Masala powder
½ Teaspoon Sugar
2 Green Chillies - slit for garnishing
Grind To Fine Paste
2 Large Tomatoes
1" Piece Ginger - chopped
3 Cloves Garlic - chopped
2 Green Chillies
For The Egg
3 Boiled Eggs
1 Tablespoon Oil
A Pinch Turmeric powder
¼ Teaspoon Red chilly powder

Method
Fry the boiled egg in a teaspoon of oil with a turmeric and red chilly powder, for 2 minutes until they turns golden brown.. Remove and keep aside.

Soak the basmati rice in water for 15 minutes.

Grind the tomato, ginger-garlic paste, green chillies to a fine paste without adding water. Remove this in a bowl, mix in the meat masala powder and sugar well. Keep aside.
Heat oil in a pressure pan,  fry the chopped onions , fry until it turns translucent. Add the tomato paste to the onions, add seasoning cube and fry until the oil separates. Add the rice and very lightly mix it with a spatula till the spice coats the rice nicely. 
Add 2½ cups water and bring this to boil on high flame for 2 minutes. Add the fried eggs cover with the cooker lid and take 2 whistles on high flame. Switch off the flame. Leave the cooker aside till your ready to serve. Open the cooker and fluffy the rice with a fork. 
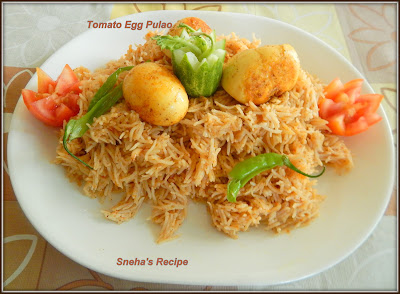
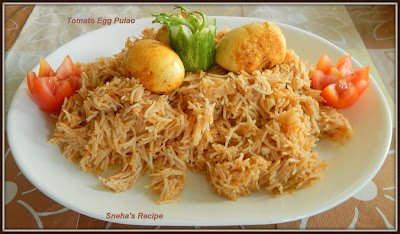
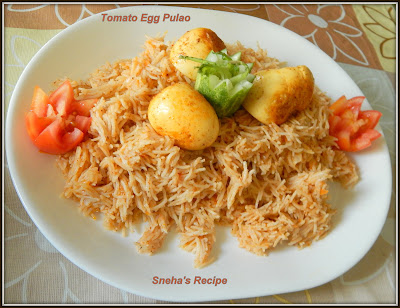
Serve in a platter with eggs on top. Serve with raita or salad.
Enjoy!!
Labels: Multi Cooker Monday, Tomato, Egg, Rice, Vegetarian, Pulao, Pressure Cooker, Main course, One Dish Meal 
Multi Cooker Monday December 2021  

Continue Reading
4 comments
Share:

Homemade Pumpkin Puree - Pressure Cooker#MultiCookerMonday

In India, pumpkin is easily available through the year. I can make pumpkin puree any time, but making it in bulk and storing it saves time, energy, also I can make any recipe that calls for it in a jiffy.
I have already shared two other methods of making pumpkin puree.

How to Roast the Pumpkin in the Oven you can check the method here Roasted Red Pumpkin - Oven. For Air Fryer Roasted Red Pumpkin.

Making your own pumpkin puree not only means that your recipe will be free of any artificial coloring or preservatives, but will also ensure that you can use this seasonal item whenever you want.

Pumpkin puree is an extremely versatile ingredient that can be used in either sweet or savory applications. You can make anything from curry to quick bread, pie to pancakes.

This easy recipe uses pure pumpkin and doesn’t have any added sugar, which means that it will work well in either sweet or savory recipes.
Homemade pumpkin puree is always better than the store bought version, as it does not have any preservatives, additives or artificial coloring ingredients. Moreover, you can opt for any type of pumpkin or winter squash that you prefer and have available. The sweetness and color will vary with the type of pumpkin you use.

Ingredients
800 Grams Red Pumpkin
50 Ml Water as required

Method
Remove the pith and seeds from the pumpkin.
Wash, peel and chop them in small cubes.
In a pressure pan, add the pumpkin and water. Place it on medium high flame for 2 whistles, reduce the flame low and let it cook for 3 minutes.  Switch off the flame.
Let the cooker cool completely. Add the cooled pumpkin cubes in a blender or immersion blender. I used a blender jar since it gives a smoother texture pumpkin puree. 
Blend till smooth without adding any water. 
Store it in a airtight container in the refrigerator for a week or freeze it in a zip lock bag for about 2 to 3 months.

My Notes
Storage: Will keep in the refrigerator for up to a week or in the freezer for up to three months.
Freezing: Freeze in silicone ice cube or muffin tins for easy access to smaller portions.
Labels: Red Pumpkin, Puree, Pressure Cooker, Multi Cooker Monday, Vegan, Gluten free, Sugar Free, No Oil Or Butter, American, Condiment

Multicooker Monday November 2021

Continue Reading
4 comments
Share:

Air Fryer Pasta Chips#MultiCookerMonday

This is another TikTok sensation made with cooked pasta that’s tossed with olive oil, parmesan cheese, spices, that are then air fried until crispy! They come out so crunchy, perfect for dipping with your favorite sauce for a fun appetizer!
These air fryer pasta chips don’t need a lot of oil. A teaspoon or up to 1 tablespoon is plenty and will make them perfectly crispy! Air Fry the pasta in batches. Depending on the size of the air fryer basket, you may need to separate the pasta into batches to avoid overcrowding, which can affect the results.
Shake the air fryer basket a few times. While cooking the pasta chips, make sure to shake the basket to allow all the surface areas to get crispy. Made this for my hubby's birthday to serve as a starter.

Ingredients
200 Grams Penne Pasta
1 Tablespoon Olive Oil
½ Teaspoon All Purpose Seasoning
Sea Salt
Hot Sauce as required

Method
Bring a large pot of heavily salted water to a boil. Cook pasta al dente according to package directions and drain.

Toss the hot pasta with olive oil, hot sauce, all purpose seasoning, salt and pepper.

Arrange a single layer in the air fryer basket and Air fryer them in a preheated air fryer at 200°C for 15 minutes, tossing a couple times.
Serve the pasta chips with a dip of your choice.
Labels: Pasta & Noodles, Air Fryer, Starters, Appetizer, Multi Cooker Monday, Vegan
Multicooker Monday - October 2021

Air Fryer Pasta Chips from Sneha’s Recipe
Birria Quesatacos (Instant Potfrom Karen’s Kitchen Stories
Black Eyed Peas and Okra (Instant Pot) from Palatable Pastime
Instant Pot Dal Dhokli from Magical Ingredients
Pork and Cabbage Starting with Leftovers (slow cooker) from A Day in the Life on the Farm

Continue Reading
3 comments
Share:

Steamed Caramel Fresh Cream Bread Pudding- Pressure Cooker#MulticookerMonday

This is quick bread, have leftover bread slices, the sides bread slice works good for this recipe. Place the pan in the pressure cooker and forget about it for the next 45 minutes. Isn't it that easy? You have a delicious caramel pudding ready for your evening tea. 
My hubby love pudding, keep's reminding me that you have not made any pudding for a long time. Just wants something sweet to eat.

7" Round Pan 
Ingredients
 
For The Pudding 
5 Slice Bread - cut into tiny pieces
500 Ml Milk
½ Cup Sugar
½ Cup Fresh Cream/Single Cream
2 Eggs - lightly beaten
1 Teaspoon Vanilla Essence
1 Tablespoon Clarified Butter
 
For the Caramel
¼ Cup Sugar  
1 Tablespoon Water


Method
In a large pot/bowl add all the ingredients for pudding and mix well, do not whisk. Leave it aside for an hour or more till the bread pieces soften.
In the meantime in a pan melt the sugar and water till it caramelizes into a slightly dark color. Do not burn the sugar or else the caramel will taste bitter.
Pour this into the pan and let it set/cool completely. I kept it in the refrigerator.
After an hour, pour the prepared pudding mixture into the cooled caramel tin.
Cover it with a aluminum foil. In a broad pressure cooker add enough water keep a ring in it. Then place the pudding pan the water level should be an inch of the pudding pan. Cover the pressure cooker take one whistle on high flame and then reduce the flame to low and keep it for 45 minutes. After 45 minutes switch off the flame. Let the cooker cool completely.
When the pudding is at room temperature, then place it in the refrigerator for 2 hours or overnight to cool completely.
Un mould it into a deep serving plate.
Slice & Enjoy!!
Labels: Pressure Cooker, Multi Cooker Monday, Steamed, Pudding, Caramel, Bread Slices, Dessert

Continue Reading
3 comments
Share:

Air Fryer Tofu 65- Vegan & Gluten Free#MultiCookerMonday

Tofu, this soya cheese which is a perfect replacement for paneer for vegan's. They are excellent source of protein with many health benefits. Tofu has a neutral taste.
Made this Tofu 65 which is an excellent for a starter or else as a snack food for my vegan guest. Since these are air fried it doesn't take much time in cooking. Once marinated, these tofu slices can be grilled in an air fryer with less effort and short time.

Ingredients
400 Grams Firm Tofu
2 Teaspoons Kashmiri Red chilly powder
1 Teaspoon Black Pepper powder
1 Teaspoon Cumin powder
1 Teaspoons Ginger garlic paste
1 Small Lemon juice
1 Teaspoon Garam masala
1 Teaspoon Pink Himalayan Salt or to taste
1 Teaspoon Oil
A Pinch of Tandoori color - optional
½ Teaspoon Oil for brushing the air fryer basket

Method
Drain the water from the tofu and cut as medium thick slices and keep aside.

Take all the ingredients in bowl except the tofu slices, mix the marinade well and then add the tofu slices. apply the marinade well on each slice. Cover and keep it in the refrigerator for at least an hour.
After an hour take it out of the refrigerator and preheat the air fryer for 4 minutes at 180°C.
Grease the air fryer basket with a pastry brush with oil. Then arrange the slices, do no crowd the basket and set the air fryer timer to 10 or 15 minutes so as to how crispy you want.

It took just 25 minutes to make two batches of these in a preheated air fryer,
The first batch I kept for 10 minutes after 6 minutes changed the sides. The next batch to make a little more crispy kept it for 15 minutes, after 10 minutes changed the sides.
I served it Mayo Chipotle Sauce , you can serve this with any sauce of your choice.

Labels: 
Air Fryer, Vegan , Gluten Free, Healthy, Tofu, Starter, Party Pleasers, Multi Cooker Monday

Multicooker Monday

Continue Reading
3 comments
Share:

Homemade Dulce De Leche - Pressure Cooker#MultiCookerMonday

There are different ways ways to make Dulce de Leche which is a delicious caramel. Here is a easy and quick method to make this caramel, which is hassle free and requires no attention.

Ingredients
1 Can (14oz) Condensed Milk
Water

Method
In a pressure cooker place the can and cover the cooker with water till the can is submerged and the water is two inches above the can.
Place the cooker on high flame and take 2 whistles then reduce the flame on medium low and let is cook for just 15 minutes. After 15 minutes switch off the flame and let the cooker cool completely. When it cools, remove the can and let this can cool completely, then refrigerate it for at least 3 hours. 
After 3 hours open the can and ta da a quick and easy Dulce De Leche is ready to use.

Labels: Condensed Milk, Pressure Cooker, Dulce De Leche, Homemade, Multi Cooker Monday   

Multicooker Monday

Recipes using small kitchen appliances

Continue Reading
5 comments
Share:

Green Masala Meat Pulao - Pressure Cooker#MultiCookerMonday

Meat Pulao is an amazing and delicious one pot meal made with boneless meat and rice, here I have used boneless mutton, you can make this with, chicken or boneless beef. It's quick and easy to make, just one pan, pressure cooker.
1 Cup Measurement = 250 Ml Cup

Serves 3 -4
Ingredients
1½ Cups Rice
300 Grams Boneless Mutton - cut into small cubes
½ Teaspoon Ginger Garlic paste
¼ Teaspoon Turmeric powder
1 Onion - finely chopped
3 Tablespoons  Green Masala Paste/Hirva Vatan
1 Teaspoon Shahi Biryani Masala
3 Cups Mutton Stock
Salt to taste
1- 2 Tablespoons Oil
1 Tablespoon Lime juice
Salt to taste
Whole Spices
½ Teaspoon Cumin seeds
1 Bay leaf
1 Big Piece of Cinnamon
2 Green Cardamoms
6 Black Peppercorns
6 Cloves
Method 
Cook the mutton with ginger garlic paste and turmeric powder with 2 cups for water in a pressure cooker.  Take one whistle on high flame then reduce the flame and keep it  for 20 to 25 minutes. When cooked strain the meat and the stock. Keep aside the meat and the stock separately.
Heat oil in the same pressure pan, add all the whole spices, when it starts to crackle, add the onions and sauté till light brown add the green masala paste and fry till oil leaves the sides of the pan. Then add the biryani masala, lime juice and sauté for a minute. Add the mutton and sauté for a minute.
Add the rice and lightly fry it for a minute add salt to taste and the stock (if the stock is less add water). Bring this to a rolling boil, cover the pan and cook for on high flame for 2 whistles. After 2 whistles switch off the flame. Open the cooker when ready to serve. Serve hot with a salad and curds. 
Enjoy !! The taste of this pulao is so delicious and yummy that one would make this very often.

My Notes
You can use chicken or beef to make this pulao.

Labels : Mutton, Pulao, Pressure Cooker, Main course, Rice, One Pot Meal, Multi Cooker Monday

Multicooker Monday - April 2021

Continue Reading
4 comments
Share:

Air Fryer Bread Manchurian#MultiCookerMonday

Bread Manchurian is a super easy, innovative and tempting snack recipe for breakfast.  Best to make this with  leftover bread. This can be made even for kids tiffin or as an evening snack.
Serves 2
Ingredients
A Pinch of Salt or to taste
¼ Teaspoon Black Pepper powder
1 Tablespoons Heaped Red Chilli Garlic Sauce
2 Tablespoon Dark Soy Sauce
3 Tablespoons Tomato Ketchup
1 Tablespoon Vinegar
½ Teaspoon Red Chilly Flakes
1 Tablespoon Noodle Masala
1 Medium Onion - finely chopped
¼ Cup Red Capsicum - diced
¼ Cup Green Capsicum - diced
¼ Spring Onion - white & green chopped
10 Bread Slices - cubed
3 Tablespoons Oil
Method

Cut the sliced bread into medium sized cubes. Air Fry them for 8 minutes at 125°C, then shake the basket and again air fry for another 5 minutes.
In a bowl add the all the sauce, red chili flakes, pepper powder , noodle masala and ketchup with 1 cup water mix well. Keep aside.
In a large pan heat oil, fry the onions till they start to change color then add the diced capsicums and stir fry for a minute Now add the mix sauces and stir fry on high flame for a minute. Add the bread cubes and stir fry quickly till all the cubes are coated with the sauces. Reduce the flame to low, cover with a lid and let it cook for 2 -3 minutes or till nicely heated.
Your tempting Bread Manchurian is ready to serve. Garnish it with spring onions greens and serve hot. 
Using the air fryer to make the bread cubes crisp, gives it a nice texture and the end result is not soggy. Enjoy this as a breakfast or an evening snack.
Labels: Leftover series, Bread Slices, Breakfast, Manchurian, Indo Chinese, Multi Cooker Monday, Air Fryer, Serves Two 

Multicooker Monday

Continue Reading
9 comments
Share:

Air Fryer Creamed Corn Vegetable Toast#MultiCookerMonday

Air Fryer Creamed Corn Vegetable Toast is ready in jiffy and with very few ingredients. You have a delicious, creamy breakfast toast.

Makes 4 - 6 toast
Ingredients

1 Cup Creamed Style Corn
3 Teaspoons Homemade Cream Of Soup Mix / Condensed Soup Mix
1 Tablespoon Each Chopped Carrot and Capsicum
1 Green chillies - finely chopped
2 Slices of Cheddar Cheese
½ Cup Milk
Bread Slices as required

Method
In a pan add the milk, Homemade Cream Of Soup Mix / Condensed Soup Mix , mix it well till it is lump free, add the cream style corn. green chilies, carrot and capsicum mix well. Cook it on medium low flame till it thickens, but spreadable, add the cheese and mix it till it melts. Cool, till it comes to room temperature.
Butter the slices of bread 
then spread the creamed corn mix on each slice of bread. Preheat the air fryer for 5 minutes 180°C. 
Place the toast on the air fryer basked and set the timer for 10 - 12 minutes or 
till the toast is slightly browned on top. Remove and serve.
This makes a wonderful breakfast.
Labels: Air Fryer, Multi Cooker Monday, Cream Style Corn ,Bread Slices, Breakfast, Cheese Slice

Continue Reading
4 comments
Share: