Cheesy Halloween Breadstick Bones#BreadBakers

Make a spooky snack to your Fright Night bash with a quick and easy recipe for soft Cheesy Halloween Breadstick Bones.

Makes 6 Breadstick Bones
Ingredients
100 Grams Bread flour
8 Grams Caster Sugar
1.5 Grams Salt
1.5 Grams Instant Yeast
65 Ml + - Water
8 Grams Butter
Shredded Cheese as needed

Method
In a bowl add the flour sugar, salt, yeast and mix well, then add the water mix well and knead to a soft smooth dough. Then add the butter and stretch the dough and fold it till butter is fully incorporated and the dough is smooth and soft. Cling wrap the bowl and leave to rise till double.
Deflate the dough and divide it into 6 equal pieces 
roll it into a smooth ball and cover , leave it aside for 10 minutes to rest.
Line a baking pan with parchment paper.
Lightly flour your work surface.
Roll each ball into rope slightly larger on the ends. Arrange the breadsticks, spacing them at leas 2 inches apart.
Using scissors, cut a 1-inch slit on the ends of each breadstick and gently stretch each of the cut pieces apart to form the ends of the bones. 
Like wise make all and place them on the lined baking tray. 
Let it rise till double in volume, brush water.  
Sprinkle shredded cheese on top. 
Bake 190°C for 15 minutes. 
Remove the breadsticks from the oven and serve them warm with marinara sauce for dipping or along with a soup of your choice. 
Labels: Bread Sticks, Halloween, Cheese, Bread Bakers, Breads, Eggless
#BreadBakers is a group of bread loving bakers who get together once a month to bake bread with a common ingredient or theme. Follow our Pinterest board right here. Links are also updated each month on this home page. We take turns hosting each month and choosing the theme/ingredient.
                                            BreadBakers

Continue Reading
6 comments
Share:

Keto Moroccan Whole Oven Roasted Chicken#EatTheWorld

I made this chicken to take for our friends house warming party. This has a crispy skin. Brining the chicken will give you this result. Points to note. Do not brine the chicken for more than 24 hours. The chicken should be pat dry before your rub it with dry prepared rub.

Ingredients
1¼ Kg Whole Chicken
For The Brine
1 Red Onion - roughly chopped
4 Cloves Garlic - chopped
2 - 3 Whole Limes
½ Teaspoon Cardamom Powder
2 1/2 - 3 tablespoons Marrakesh Market Blend
2 Teaspoons Pink Himalayan Salt or Sea Salt
Other Ingredients
2 -3 Tablespoons Olive oil
For The Dry Rub
2 Teaspoons Turmeric powder
1 Teaspoon Smoked Paprika
1 Teaspoon Cayenne pepper powder
1 Teaspoon Cumin powder
1/2 Teaspoon Cinnamon powder
1/2 Teaspoon Salt
1/2 Teaspoon Black Pepper powder

Method
For Brining The Chicken
Add all the ingredients in a large pot and the chicken, cover the chicken with water - enough to submerge it. Refrigerate it only for 24 hours. After 24 hours, wash the chicken well inside out with fresh water to remove all the excess salt. Place it on a wire rack to remove all the excess water in a sitting position. After 15 -20 minutes, dry this a clean cloth. The chicken should be pat dry or else you will not get a crispy skin.
For The Dry Rub
Mix the ingredients for the dry rub in a small bowl. Add the oil and mix it well in. Rub over the chicken. 
Place in a 9-inch x 13-inch roasting pan. Nestle a sliced lime in the cavity of the chicken and tie the legs with a thread. Roast it in a pre heated oven with both the elements on at 200°C for 1 hour tented with a foil. 
After an hour remove the foil, change the side / flip the side of the chicken again bake for 45 minutes to an hour or till the chicken is cooked when the thermometer inserted on the thicken part of the chicken reaches the temperature is 165°F / 74°C. Now broil ( only the top element on at 225°C degrees for 10 minute. 
The chicken is done to perfection. Take this out and serve hot.

My Notes
All nutritional data are estimated and based on per serving amounts.
Net Carbs per serving: 3 g
Labels: Eat the World, Moroccan, Middle Eastern, Chicken, Baked


Check out all the wonderful Moroccan dishes prepared by fellow Eat the World members and share with #eattheworld. Click here to find out how to join and have fun exploring a country a month in the kitchen with us! 
 Amy’s Cooking Adventures: Kefta Tagine with Eggs in Tomato Sauce 
Culinary Adventures with Camilla : Briwat Bil Kefta + Other Moroccan-Inspired Bites 
Pandemonium Noshery: Bissara - Moroccan Legume Soup  
A Day in the Life on the Farm: Harira CulturEatz: Chicken Bastilla  
Magical Ingredients: Spicy Moroccan Vegetable Tagine

Continue Reading
4 comments
Share:

Pannekaken - Norwegian Pancakes#SundayFunday

These Norwegian pancakes are thinner, lighter, delicate, and yet hearty. Pancakes are ideal for breakfast, for a brunch or a perfect sweet for dessert after a meal or savoury toppings and fillings for lunch boxes. Since I, was making this sweet, added vanilla extract.
Makes 8 pancakes used a 10" skillet
250ml Cup
Ingredients
2 Eggs
1 Cup All Purpose Flour
1½+- Cups Milk
¼ Teaspoon Salt
¼ Teaspoon Vanilla Extract
1 Tablespoon Caster Sugar
Butter for greasing the pan

Method
Whisk the eggs, salt, sugar, milk until they turns frothy, now add the flour and whisk everything into a thin batter. Let this rest for 10 minutes.

Heat a greased non stick pan with butter on medium flame, spoon the batter and move the griddle to form a thin circle.

Cook on on low flame until they turns light golden in color from the bottom. Then flip and let is cook for a minute. Remove to a plate. Repeat with remaining batter.
Serve warm with powdered sugar, jam or Nutella.
These were great! Thin and tasty, not very sweet, perfect with sweet toppings or savory fillings! A must try recipe!
Labels: Pancake, Norwegian, Sunday Funday, Breakfast, Brunch, Savory
For Sunday Funday we are Cooking for Leif Erikson Day

  • Meatball Lefse Wraps from Amy’s Cooking Adventures
  • Crispy Green Herb Patties from Food Lust People Love
  • Kjøttkaker med brunsaus (Norwegian Meatballs) from A Day in the Life on the Farm
  • Norwegian Havre Kjeks (Sweet and Salty Oatmeal Rounds) from Karen’s Kitchen Stories
  • Pannekaken - Norwegian Pancakes from Sneha’s Recipe
  • Suaasat, a Greenlandic Christmas Stew from Culinary Adventures with Camilla
  • Swedish Pickled Herring Appetizer from Palatable Pastime
  • Continue Reading
    3 comments
    Share:

    Rose Cham Cham#Foodieextravaganza

    Festival season is on and you will find varieties of Indian desserts, mithais or sweets confectioners in all textures, shapes, and color. All these colorful decadent treats are irresistible. I have already posted a Rasgulla recipe on blog check the recipe.

    Today I'm posting a new flavor of Cham Cham which is a stuffed sandwich, has a Rose flavor and color. Cham Cham or chom chom is a Bengali delicacy. These pink cham chams are delicately laced with the flavor of cardamom and rose water.

    What's the difference between a Rasgulla and a Cham Cham?
    Rasgullas are round and fluffier they are not stuffed. While cham chams are oval/ rectangular in shape and are stuffed with a filling. The outer covering /raw materials are identical though, its all about how you make them. Traditionally most Bengali sweets the basic process of making are the same. The state of West Bengal in India is famous for its milk sweets like Rasgulla, Sandesh and other curdled milk mithais.

    Serves 5 
    Ingredients

    For The Chena / Soft Paneer / Cottage Cheese

    1 Liter Full Fat Milk
    2 Tablespoons Lemon Juice or White Vinegar
    For the Sugar Syrup
    1 Cup Sugar
    3 Cups Water
    1 Teaspoon Corn Flour or All Purpose Flour
    For The Filling
    To Make The Homemade Instant Mawa / Khoya
    ½ Cup Full Fat Milk Powder
    1 Tablespoon Milk
    4 Teaspoons Condensed Milk
    1 Tablespoon Desi Ghee
    2 Drops Rose Essence
    A Drop Red Food Color

    Method
    To Make The Chena/ Fresh Paneer
    Boil whole milk in a heavy bottom pan, stirring continuously so that the milk does not stick at the bottom of the pan. Once it comes to a boil, switch off the flame let is rest for 2 - 3 minutes.
    After two to three minutes. Add lemon juice gradually and keep stirring and let the milk curdle. Let it cool down and allow the milk to separate.
    Place cheesecloth on a mesh strainer and strain the water. Rinse it under running water to remove the sourness of lemon juice and squeeze off the excess liquid. You can also hang it so that all the excess water drains off. Then take the chena in your hand and squeeze out remaining water slowly.
    Let it sit until we make the sugar syrup.
    To Make The Sugar Syrup
    In a large pan mix sugar and water. Allow the sugar to dissolve and bring to a boil.

    As the syrup is cooking let's work with the Chena.
    Take the chena into a plate and add the corn flour, knead until smooth for 5-6 minutes. 
    Make it lump free and smooth dough, the small piece of dough when roll should be crack free. So knead it really very well.
    Divide this dough into 5 equal parts/balls 
    Make rectangular shape / oval shape cham cham. You can also make any other shape you like. Roll this well first and then shape it rectangular.
    To Cook The Cham Cham 
    Once the sugar syrup boils and the sugar melts.
    Gently slide in the prepared cham cham to it, cover and cook for 8 minutes on high flame.
    After 8 minutes open the pan, flip each cham cham and cover and cook again for another 8 minutes on medium high flame. After 8 minutes, switch off the flame and let it rest with the lid on, cool it down completely. 
    Let the cham cham remain in the sugar syrup for about an hour or more. They should cool down completely before you fill them.

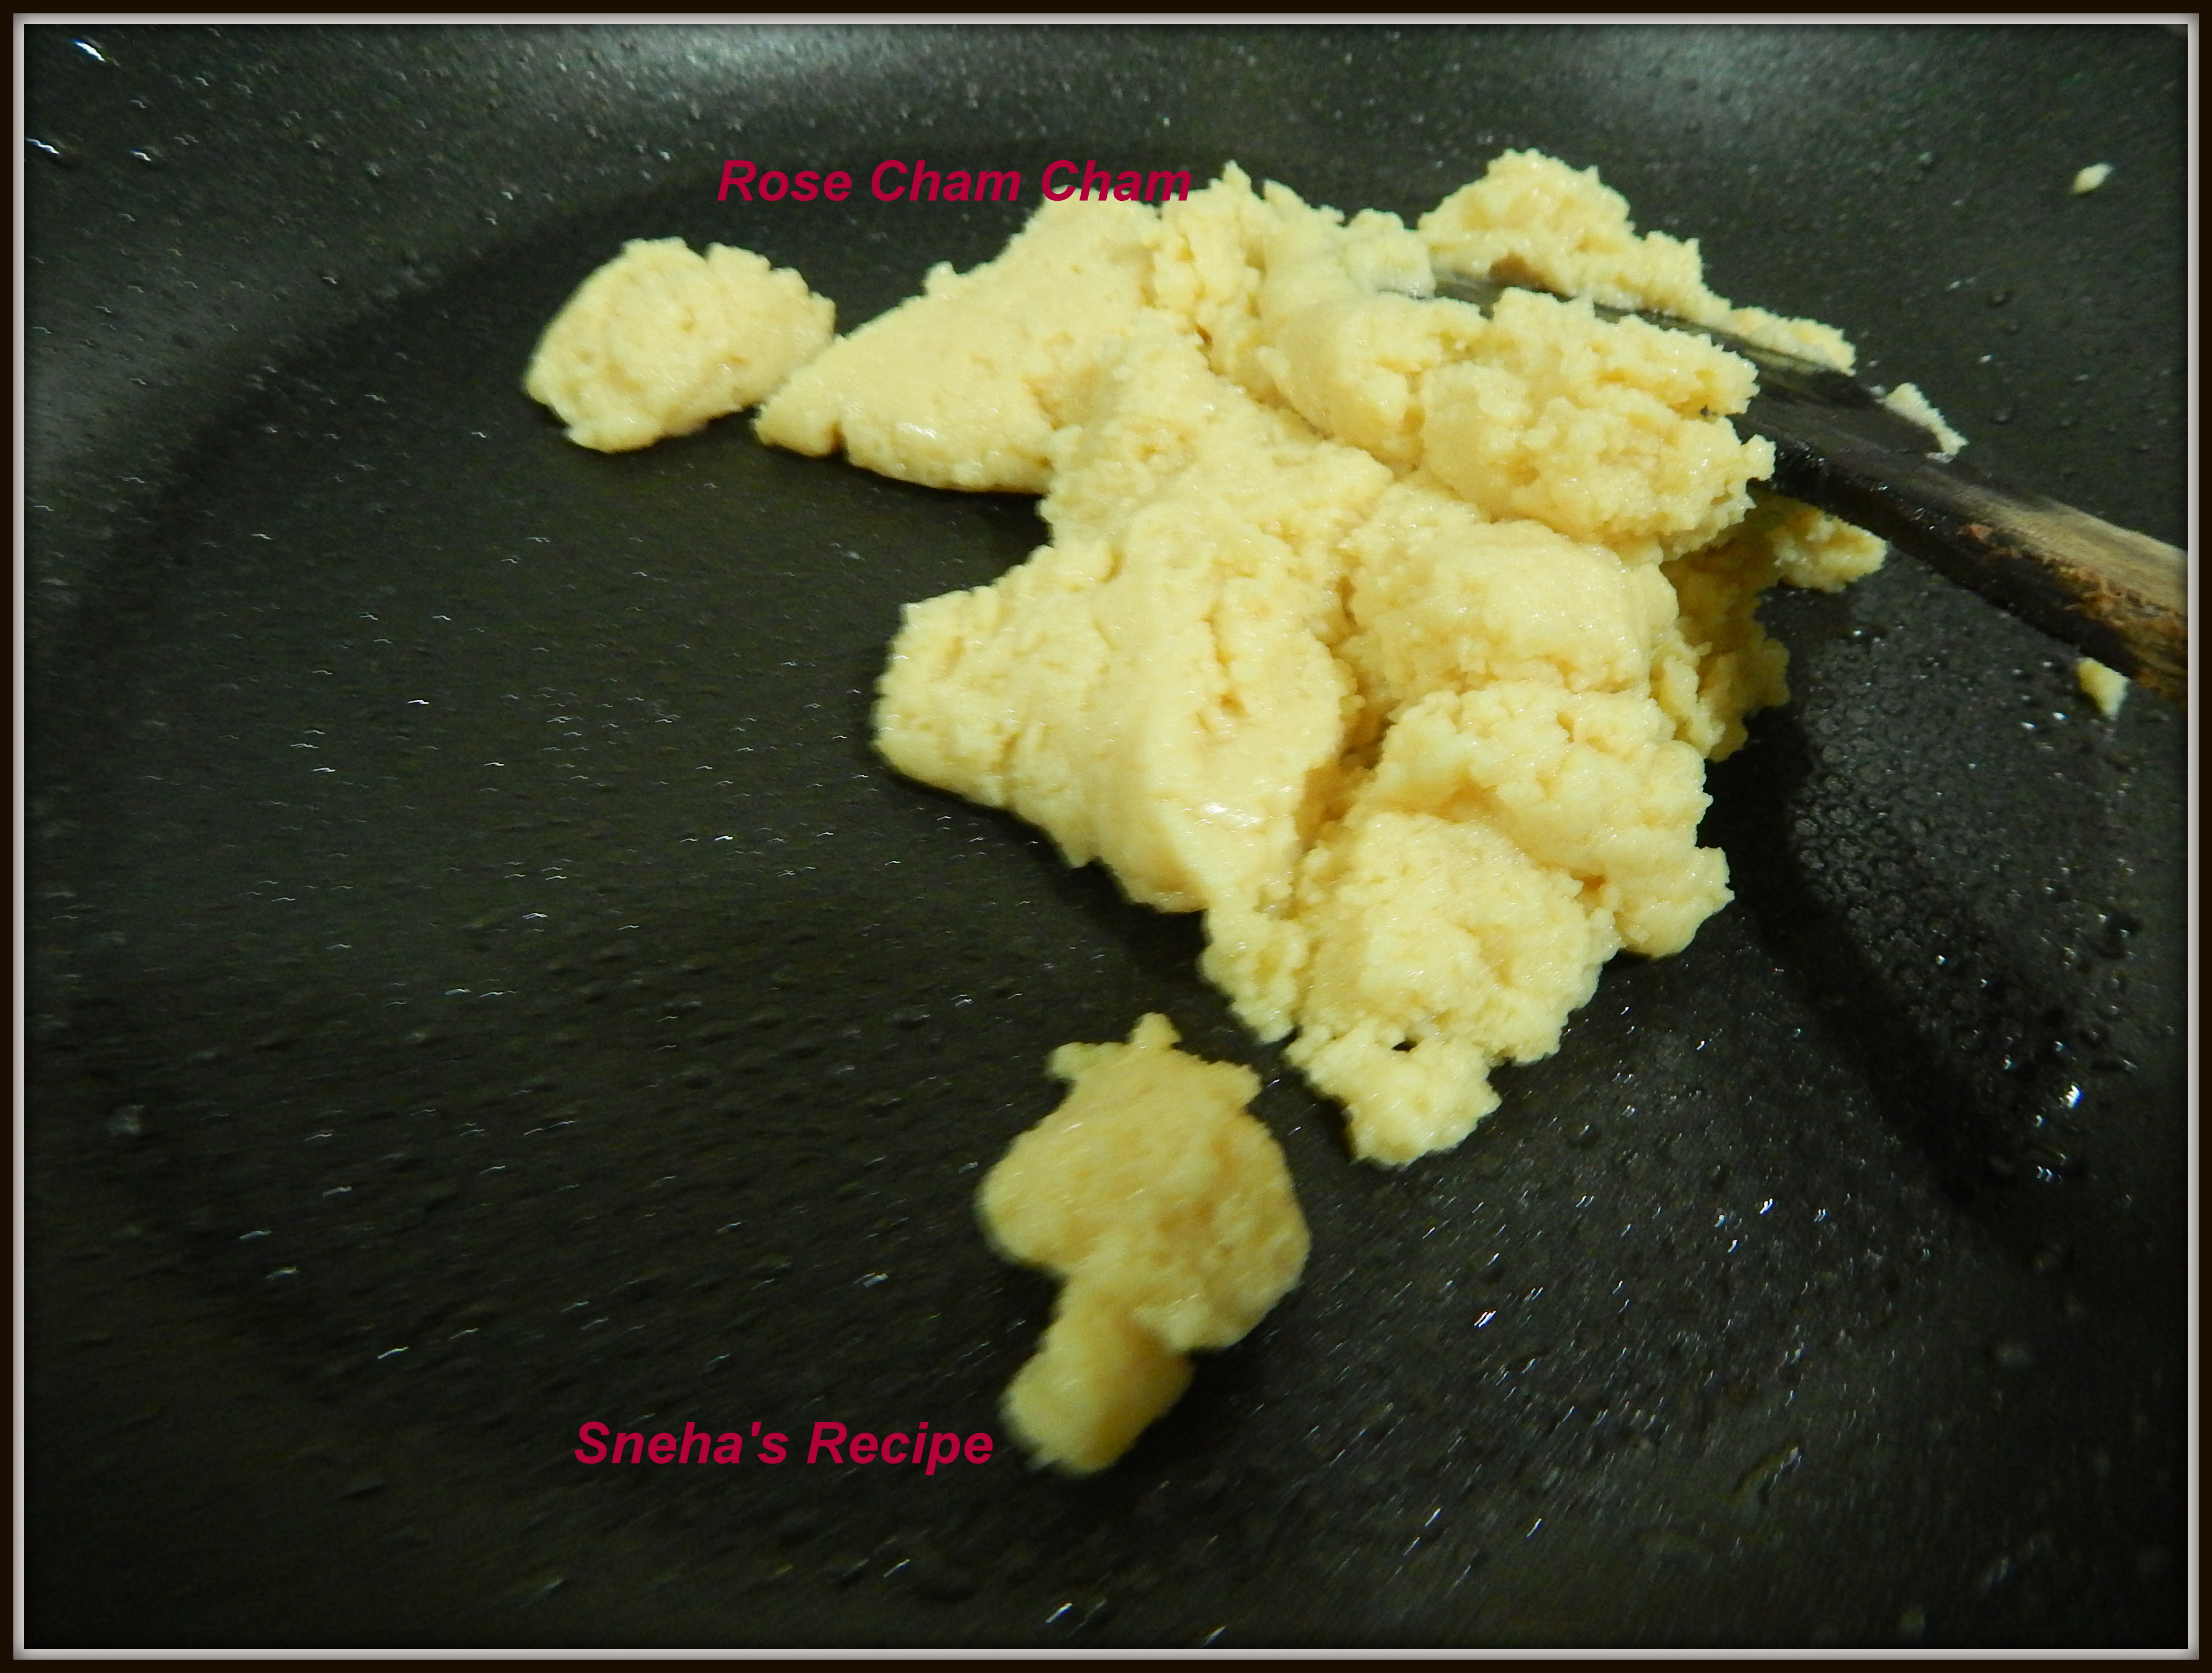
    To Make The Filling / To Make The Homemade Instant Mawa / Khoya
    Check the recipe of the traditional method of making Mawa / Khoya on this blog.
    Mix all the given ingredients well together. 
    In a heavy pan add the prepared mixture and cook it for 2 -3 minutes on medium low flame. Keep stirring continuously till it thickens and start to form a ball.
    It should be soft so do not cook it too long. Remove this into a plate and let is cool down. 
    Add the rose essence, food color and mix well to get a uniform color. Our filling is ready now. Divide this into 5 equal parts, roll each into a rectangular shape smaller then the cham cham.
    Remove the cham cham's on a wire mesh place it on a large plate to catch all the sugar syrup or else the counter top will become messy. Let all the syrup drain for about 5 minutes.
    Take each cham cham and slit it halfway through lengthwise. Fill in the stuffing and decorate with sliver warq or nuts or glazed cherries. Rose Cham Cham are ready.  
    Serve & Enjoy! Rose Cham Cham taste best when chilled. It can be stored in the refrigerator for 3-4 days.
    My Notes
    Use full-fat milk for this recipe
    If you have ready store bought mava/khoya then grate - a100 to 150 grams of it this well just add 2 - 3 tablespoons of powdered sugar and mix well, taste for sweetness add more according to your taste, add essence and food color. 
    Labels: Sweets & Desserts, Indian, Festival Sweets, Foodie Extravaganza Party, Paneer, Mawa, Homemade
    For Foodie Extravaganza our theme this month is Simply Desserts!

    Food Lust People Love: Clementine Pistachio Upside Down Cake 
    Karen’s Kitchen Stories : Butterscotch Pots de Creme 
    Sneha’s Recipe: Rose Cham Cham 
    Magical Ingredients: Dried Fruits and Nuts Roll 
    A Day in the Life on the Farm: Pumpkin Parfaits

    Continue Reading
    3 comments
    Share:

    Mixed Fruit Smoothie#SundayFunday

    This is a delicious, healthy smoothie with nutrient-rich fruit and probiotic yogurt . This is a perfect healthy breakfast to start the day, it also makes a refreshing drink for a hot summer afternoon or even a dessert.

    Makes 
     2 - 3 servings
    Ingredients
    1 Cup Fruit Cocktail - frozen
    1 Orange - de seeded and segmented
    5 Strawberries - chopped
    1 Big Guava chopped
    2 Thick slices Pineapple
    2 - 3 Tablespoons Sugar
    1 Cup Fresh Thick Yogurt

    Method
    Blend all together. Strain the smoothie to remove the guava seeds pour into glasses.
    It's filling & delicious. Enjoy!!
    Labels: Smoothie, Mixed Fruits, Yogurt, Sunday Funday
    For Sunday Funday we are sharing Smoothie Recipes. Do check the other recipes.

    Continue Reading
    2 comments
    Share: