Showing posts with label Japanese. Show all posts

Chicken Tempura With Wasabi Dipping Sauce#SundayFunday

This Japanese chicken tempura recipe combines flavorful seasoned chicken with a crispy and fluffy tempura batter and Wasabi Dipping Sauce. It is such a delicious appetizer, you won't believe how easy this recipe is to make. In fact, the entire thing comes together in only 30 minutes!
Ingredients
2 Boneless Chicken Breast - cut into cubes
1 Tablespoon Vinegar
1½ Teaspoons Red Chili Powder
½ Teaspoon Salt
½ Teaspoon Ginger Garlic Paste
Oil as required for deep frying
Ingredients For Batter
½ Cup All Purpose Flour
3 Tablespoons Corn Flour
1 Teaspoon Baking Powder
Salt to taste
2 Tablespoons Oil
2 Egg White Only
Club Soda Or Chilled Water as required
Wasabi Dipping Sauce 
¼ Cup Plain Greek Yogurt
¼ Cup Sour Cream
½ Teaspoon Wasabi
¼ Teaspoon Salt
1 Tablespoon Soy Sauce
1 Tablespoon Worcestershire sauce

Method
Wasabi Dipping Sauce
Stir together all ingredients for dipping sauce and refrigerate for at least an hour before serving.
Cut chicken breast in strips.
Marinate chicken with vinegar , chili powder, salt, ginger garlic paste and oil leave it for 15 minutes.
In the meantime heat oil in a deep frying pan.
For The Batter
Mix all the ingredients to prepare the coating consistency batter.
Dip each chicken cube in prepared batter and deep fry on medium high flame till the outer covering is crisp and chicken is cooked. 
Cool & Enjoy with Wasabi Dipping Sauce... yum yum!
Labels: Appetizer, Japanese, Tempura, Chicken, Deep Fried, Sunday Funday, Asian Cuisine, Wasabi, Dipping Sauce
In Sunday Funday we are celebrating National Tempura Day.   

Continue Reading
3 comments
Share:

Vegetarian Omurice /Japanese Fried Rice Omelette#EattheWorld

Omurice, it's a Japanese invention that combines an omelette with fried rice. You'll often hear it referred to as omuraisu, omumeshi or omuretsu" and "raisu," the Japanese pronunciations of "omelette" and "rice" Some versions have the rice rolled up in the omelette
I'm also sharing here, a traditional Capsicum Ketchup, since it's easy and tasty, while the recipe calls for Okonomiyaki Sauce.
Japanese Omurice is made with chicken, but Koreans commonly use beef, pork or ham as well. Shrimp is another good option.
I have used vegetables, like carrot, onion, and scallion. You can also add  celery, zucchini, or mushrooms. 

I used 2 eggs per serving for this recipe, but you can use 3 if you want a thick omelette covering your rice. You can also add a little bit of heavy cream or milk for a softer omelette, but I didn’t include it in this recipe. This is an easy fried rice flavored with sweet, tangy ketchup and wrapped in an egg omelette.
Serves 2
Ingredients

1 Medium Onion - finely chopped
1 Scallion - finely chopped
1 Small Carrot - finely chopped
½ Teaspoon Black pepper powder
1 Tablespoon Soy sauce
3 Tablespoons Capsicum Ketchup - recipe below
½ Teaspoon Salt
2 Tablespoons Oil or as required for pan frying
2 Cups Heaped Cooked Cold Rice -
4 Eggs
To Make the Kewpie Mayonnaise
1 Cup Mayonnaise
¼ Teaspoon Garlic powder
2 Teaspoons Tomato Ketchup

Method
Prepare the fried rice ingredients by finely chopping all the veggies.
Heat a large skillet over medium high heat f oil. Add the onion, scallion, carrot and stir fry until the onion turns soft. Stir in soy sauce, salt and pepper to taste.

Reduce the heat to medium. Add the rice, and stir well until the clumped up rice is broken up and all the ingredients are well combined. Add capsicum ketchup (adjust to taste), salt and pepper to taste, continue to stir until the ketchup is evenly incorporated into the fried rice. Keep this aside.  

Heat a lightly oiled small non-stick pan over medium low heat.

Crack and beat 2 eggs in a bowl with a spoon or a fork. Stir in a pinch of salt. Add the egg mixture to the pan and swirl it around to cover the pan.

When the bottom is set but the top is still runny, turn off the heat and add one serving of the fried rice in the middle of the egg omelette.  Using a spatula, fold both sides of the omelette over the rice. Push the whole Omurice to the side of the pan.
Flip it onto a plate. Top it off with a squeeze of ketchup or Kewpie mayo. It's ready to enjoy.

Capsicum Ketchup
Ingredients
1 Tablespoon Olive Oil
1 Medium Onion - finely chopped
1 Large Red Capsicum - roasted
200Ml Tomato Puree
4 Ripe Tomatoes - chopped
¼ Cup Apple Cider Vinegar
1 Stalk Celery - chopped
1" Piece Ginger - chopped
4 Cloves Garlic - chopped
¼ Cup Dark Brown Sugar
2 Teaspoons Honey
1 Teaspoon Salt
½ Teaspoon Coriander powder
¼ Teaspoon Nutmeg Powder
¼ Teaspoon White Pepper

Method
Roast the capsicum in a preheated oven at 180°C for 15 minutes or until the skin start to blacken or on the gas flame. Wrap the capsicum, in aluminum foil, fold over the edges to seal and trapped steam which will help loosen the skin from the capsicum. Once cooled, peel the skin off, de seed it and roughly chop them.
Add the olive oil to a pan and sauté the onions, celery, ginger, and garlic until they are just starting to turn brown around the edges. Add the capsicum, dark brown sugar. Cook, stirring until the sugar has melted. Add the chopped tomato, vinegar, tomato puree and salt, Gently simmer over low heat, stirring regularly. Once the softens and the sauce starts to thicken, switch off the flame. Allow the mixture to cool. 
Add the cooled mixture to a food processor or blender and process until smooth. 
I wanted the ketchup smooth, so passed the blended mixture through a fine sieve and discarded the solids. Now add the sauce back into the pan, add in the honey, coriander, nutmeg and white pepper powder. Give this a good mix and bring this to a boil, reduce the flame and it simmer till it form a thick sauce consistency, switch off the flame, cool. 
Capsicum Ketchup is ready.
You can freeze the remaining in an airtight container for 2 - 3 months.

My Notes
If the rice is a bit too hard after being in the fridge, heat it up in the microwave to soften it a little.
You can also shape the Omurice by hand using aluminum foil or a paper towel. Drizzle some ketchup on top. Repeat the last 3 steps for another serving.
Labels: Omurice, Japanese, Asian Cuisine, Vegetarian, Egg, Kwepie, Mayonnaise, Capsicum, Ketchup, Homemade, Eat the World
                   
Each month a group of us join Evelyne of CulturEatz as she travels to different countries to Eat the World. This month it's secret Santa wherein we can choose any dish by the blog assigned to us.  
Check out all the wonderful Japanese dishes prepared by fellow Eat the World members and share with #eattheworld. Click here to find out how to join and have fun exploring a country a month in the kitchen with us! 
 Amy’s Cooking Adventures: Yoshinoya Beef Bowl (Gyudon) 
A Day in the Life on the Farm: Japanese Rice 
Pandemonium Noshery: Ginger Pork Stir Fry 

Continue Reading
3 comments
Share:

Anpanman Rolls#SundayFunday

Anpanman is a character bread ” that was inspired by the cartoon character. Kids love such cartoon characters, but let me tell you that I too enjoyed creating this character, it was a fun project.
I thank Sue of Palatable Pastimes for choosing such a fun theme for our Sunday Funday event, wherein, she asked us " Let's create some cute and whimsical kawaii recipes, "Kawaii" means "cute" in Japanese."
Kawaii recipes are perfect for kids.
Ingredient
130 Grams All Purpose Flour
10 Grams Sugar
2 Grams Instant Yeast
20 Grams Softened Butter
2 Grams Salt
80 to 90 Ml Warm Mil
Pink Food coloring
1 Tablespoon Beaten Egg
Black Color or Choco pen
Method
In a large bowl mix in the flour and salt in a bowl. In a jar mix in the milk, sugar and yeast , keep it aside for 5 minutes. Then add in the yeast mixture to the flour and knead to form a smooth dough. Take the dough on to a work surface add the softened butter and knead again for 5 minutes till it smooth and soft dough. Place this in a oiled bowl, cover and let it rise till double in volume.
Deflate the dough and divide the dough into 4 equal parts. Keep the three parts aside covered. 
For the remaining one, add the food coloring and knead it well. Divide this into 9 equal parts. Roll them into smooth round ball. Cover with a wet cloth and let rest for 15 minutes.
Take the three dough balls and roll each into a round smooth ball and place them in long oiled aluminum tray/mold.
With your finger make an indent the part that hits the nose and cheeks, and put the nose and cheeks on it. Cover and keep it rise for 15 minutes.
Apply the egg wash to Anpanman Rolls. Bake in a preheat oven at 180°C for 18 to 20 minutes. 
Cool on a wire rack completely.
After baking and cooling, draw facial parts with black food color. 
Complete and I am loving it!
Labels: Breads, Japanese, Kawaii, Chocolate, Sunday Funday
Sunday Funday - Kawaii Recipes

Continue Reading
2 comments
Share:

Tangzhong Loaf With Cinnamon Sugar Topping#BreadBakers

This is a buttery soft, bread. The cinnamon sugar and butter topping adds a fantastic flavor and richness to the bread. You will love this bread.

Ingredients
For The Tangzhong/ Yudane Dough 

20 Grams All Purpose Flour 
100 Ml Milk For The Dough
For the Bread Dough
40 Ml Lukewarm Milk 
1 Teaspoon Instant Yeast
280 Grams Bread Flour
1 Egg
1 Tablespoon Milk Powder 
2 Teaspoons Caster Sugar 
1 Teaspoon Salt 
30 Ml Whipping Cream 
25 Grams Unsalted Butter
For The Topping
2 Tablespoons Softened Butter
½ Teaspoon Cinnamon Powder
2 Teaspoons Caster Sugar

Method
For The Yudane Dough/Tangzhong
Bring the milk to a boil and then pour the flour and mix it well it forms a dough. Cling wrap it so that a skin is not formed. Keep it aside to cool.
In a another bowl add the yeast, milk, sugar and mix well, keep it aside till it froths/bubble.
In a large mix bowl add the egg , salt, whipping cream and the yudane dough, mix well. Add in the yeast mixture and again give it a good mix, then add in milk powder and flour, knead to form a soft dough. Take this on to work surface and knead well. Then add it the butter and stretch fold till the dough is smooth and soft. 
Keep this in a oiled bowl and let it double in volume.
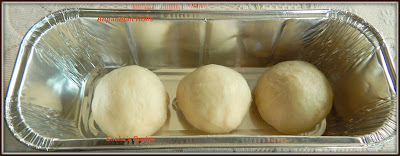
Deflate the dough and divide into four equal parts. Roll it into a ball and let it rest for 15 minutes.
Grease the bread pan with butter well and keep aside.
Take one ball and keep the other covered. Flatten it with a rolling pin into a oval shape 
Overlap the long end 
on each other- like this then 
Lightly flatten it with a rolling pin then roll it into a roll and place it into greased pan. Same way work the other dough.
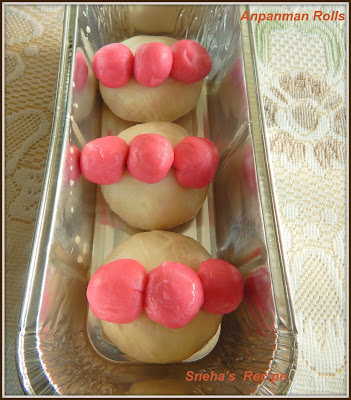
Cover the pan with let it again double in volume.
For The Topping
Mix the caster sugar and cinnamon powder , keep aside
In a piping bag add the softened butter. Snip the bag a little
with a scissor.
Give slight cut on each of the bread. 
Pipe the butter on each of the cuts.
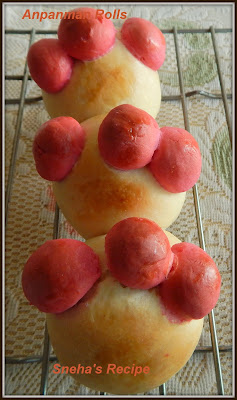
With a spoon place the cinnamon sugar on the butter.
Bake in a preheated oven at 190°C for 20-25 minutes. 
When it's out of the oven, brush the bread with butter.
Cool it a little, un mold and keep it on a cooling rack.
Slice & Enjoy!!
Labels: Breads, Bread Bakers, Tangzhong Method, Egg, Cinnamon, Japanese
#BreadBakers is a group of bread loving bakers who get together once a month to bake bread with a common ingredient or theme. You can see all our lovely bread by following our Pinterest board right here. Links are also updated after each event on the #BreadBakers home page. We take turns hosting each month and choosing the theme/ingredient
#BreadBakers is a group of bread loving bakers who get together once a month to bake bread with a common ingredient or theme. You can see all our lovely bread by following our Pinterest board right here. Links are also updated after each event on the #BreadBakers home page. We take turns hosting each month and choosing the theme/ingredient. This month the Bread Bakers are making Tangzhong Breads, a theme chosen by Karen from Karen's Kitchen Stories.


BreadBakers
And don’t forget to check out all the amazing breads baked by our talented bakers ~

Easy Cinnamon Rolls from The Wimpy Vegetarian
Eggless Nasturtium Greens Sandwich Bread (Tangzhong Method) from Cook with Renu
Japanese Chocolate Milk Bread from Passion Kneaded
Japanese Milk Bread Buns from Ambrosia
Japanese Milk Bread Rolls from A Day in the Life on the Farm
Pineapple Buns (Bolo Bao) from Karen's Kitchen Stories
Sourdough Pumpkin Babka from Zesty South Indian Kitchen
Tangzhong Kolaches from A Messy Kitchen
Tangzhong Loaf with Cinnamon Sugar Topping from Sneha's Recipe
Tangzhong Pumpkin Cinnamon Buns from Magical Ingredients
Tangzhong Sourdough Bread from Food Lust People Love

Continue Reading
9 comments
Share: