Showing posts with label Continental Cuisine. Show all posts

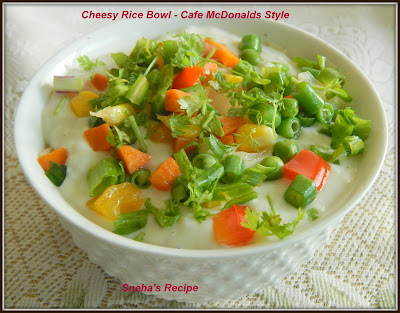
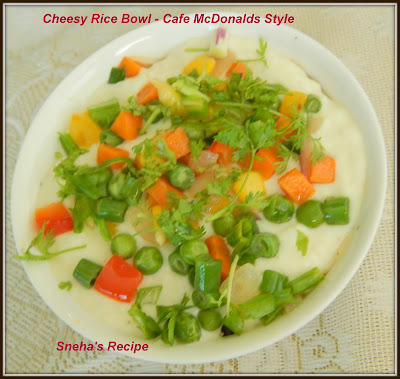
Cheesy Rice Bowl - Cafe McDonalds Style#SundayFunday

This Continental recipe is such that you will feel tempted to finish this dish in one go. This is an easy-to-make one-pot meal that can be served to your guests in a parties and get-togethers. This cheesy rice bowl is made of fried rice is made with a twist - boiled wheat grains are added to enriched with a combo cheesy white sauce and Italian spices.
Making this at home is so easy, tasty and you will have a clean and healthy bowl of meal.
Ingredients
½ Cup Wheat Grains
1 Cup Basmati Rice
Salt as required
For The Cheese Sauce
2 Tablespoons Butter
2 Tablespoons All Purpose Flour
1½ Cup Milk
2 -3 Cheddar Cheese Cubes - grated
Salt & Pepper to taste
For The Rice & Garnish
1 Tablespoon Butter
1 Tablespoon Oil
1 Cup Mixed Veggies
Salt to taste
1 Teaspoon Sugar
½ Teaspoon Dried Oregano
½ Teaspoon Black Pepper powder
½ Teaspoon Dried Basil
½ Teaspoon Red Chilly Flakes
2 Tablespoon Red Chilli Sauce
1 Tablespoon Chopped Coriander Leaves 

Method
Wash and soak the  wheat grains in water for minimum 45 minutes .
Add this in the pressure cooker with 2 cups water and salt to taste, cover and on high flame take 4 whistles, after 4 whistles lower the flame for let continue cooking for another 15 minutes. Switch off the flame and let the cooker cool completely. Strain and it and reserve the water.
Wash and soak the rice for 15 minutes. Then cook the rice with 6 times the water and a teaspoon of salt, on high flame till done yet the grain should firm and whole. Strain and let it cool.
For The Cheese Sauce
In a pan heat butter, add the flour, with a whisk cook it for 2 minutes stirring continuously add milk and stir to make a smooth sauce. Let it come to boil stirring continuously, add grated cheese and cook till cheese is melted, add salt, pepper and cook till it thickens. Remove from flame and keep aside.

For The Rice
Heat a kadai/pot add butter and oil then add the chopped vegetables and sauté them for a minute on high flame then add sugar, salt. Remove half of the vegetables into a bowl(this is for garnishing) add the oregano, salt, pepper basil, red chilly flakes , red chilly sauce , coriander leaves and saute on high flame for a minutes stirring continuously. Add the boiled wheat and rice and toss it well till they are coated with the spices , taste and adjust the seasonings. Switch off the flame.
To Assemble The Bowls
Pour the fried rice till the top pour ¼ cup of the cheese sauce or more as per your taste, top it with the sautéed veggies. 
Serve & Enjoy!!
You can check some of the other bowl recipes
Couscous Shrimp Buddha Bowl 
Loaded Veggie & Potato Soup In a Bread Bowl 
Mexican Vegetarian Burrito Bowl
Labels:
Rice, One Bowl, Cheese, Whole Wheat, Main course, Continental Cuisine, Vegetarian, Sunday Funday, Mixed Veggies

For Sunday Funday our theme is Bowl Meals/Hearty Meal In a Bowl.
 
A Day in the Life on the Farm: Shredded Beef Taco Bowls 
Amy’s Cooking Adventures: Greek Chicken Rice Bowls 
Palatable Pastime: Saffron Bulgur Bowl 
Food Lust People Love: Shrimp Spring Roll Bowls 
Mayuri’s Jikoni: Baked Falafel Bowl 

Continue Reading
3 comments
Share:

Vegetarian Rice Roni With Homemade Rice Roni Mix

This Homemade Rice Roni is a blend of rice and pasta which then cooked in butter, chicken/vegetable stock and seasonings until light and fluffy. A quick easy dish that tastes so good. This Homemade Rice-A-Roni has no artificial ingredients and is absolutely delicious. 

I had this rice roni many times when I stayed abroad.  I loved it , but, here it's not available so made my own.  This is a basic mix, you can have many add ons/flavorful spices to it when you are cooking this as a meal.
This Homemade Rice Roni is the perfect accompaniment to make a complete and delicious meal with chicken, fish, steak or shrimp. I also used this to make this  Colombian Arroz Atollado

Ingredients 
200 Grams Spaghetti - broken into pieces
2 Cups Basmati Rice
1 Tablespoon Oil
Method
Wash the rice with a wet cloth and let it dry for some time. In the meantime in a pan heat a tablespoon of oil and fry the spaghetti  for a minute or two only. Cool and mix it with the rice.  
Homemade Rice Roni Mix is ready.  

I made a vegetarian version of this for our lunch.
Vegetarian Rice Roni
Ingredients
1 Tablespoon Dried Chives
1 Teaspoon Italian Seasoning Mix 
1 Bay Leaf
¼ Teaspoon Black Pepper Powder or to taste
1 Vegetable Stock Cube
1 Scallion/Spring Onion -  chopped 
1 Medium Onion - chopped  
1 Teaspoon Minced Garlic 
5 - 6  Broccoli Florets
¼ Cup  Diced Carrots
¼ Cup  French Beans - chopped
½ Cup  Colored Bell Peppers - chopped 
1 Small  Tomatoes - chopped  
Cups  Rice Roni
3½  Cups Water
2 Tablespoons Butter
1 Tablespoon Oil
Method
Heat oil and butter in a large pot/pan, fry the onion, till translucent, add all the veggies, chives, seasoning , bay leaf and saute for a minute.  
Add the stock cube, water , give it a light mix and bring this to a rolling boil.  
Now add the rice roni , give it a light stir. Cover, let it be on high flame for a minute then reduce the flame to low and let it cook for 12 -15 minutes giving it a light stir after 5 minutes.  Check for taste and seasoning, add black pepper powder to your taste ( this is optional). 
When liquid has been absorbed, take a test bite to see if rice is cooked through. Add  hot water if necessary and continue cooking if it needs a bit more time.
 
Delicious Rice Roni is ready to enjoy. 
Serve this with Egg And Cauliflower Salad. 

Continue Reading
No comments
Share:

Oil Free Baked Spiced Fish En Papillote#FishFriday

This month’s Fish Friday Foodies theme is Seafood / Fish en Papillote (i.e. the fish / seafood is baked and served in parchment paper) or called as is a meal in a packet. Our Host for the month is Sue.
This is the second recipe of Fish en Papillote. My earlier recipe is Mediterranean Fish En Papillote. Today's recipe is Oil free and yet so delicious. To tell you the truth, forgot to drizzle oil on the fish and when one packed was served to daughter's packet, she said Ma this fish is "Oiless" yet so yum, it's then I realised it. Any way since this had coconut and spice, the oil was not needed, since coconut does releases oil at the time of cooking. 

Do try this it's really really tasty and yum.. you will love it!


Ingredients  
2 Medium Whole Pomfret Fish
4 Tomatoes - sliced in thick roundles
2 Lemons - sliced in thin roundels
8 to 10 Mushrooms

2 Green Chillies - de seeded and slit
1 Red Chilly - de seeded and slit
To grind to a fine paste
1 Cup Freshly Grated Coconut
6 Cloves Garlic - chopped
Juice of 2 Small Lemons
6 Green Chillies
1 Teaspoon Cumin powder
2 Teaspoons Coriander powder
1 Teaspoon Salt
1/2 Teaspoon Turmeric powder
1/2 Teaspoon Garam Masala powder
A Handful of Green Coriander Leaves

Salt to taste

Method 
Wash,  clean the fish and give a slit in the center as you give to stuff the fish. Apply 1/2 teaspoon salt on each fish and few drops of lemon juice on it and keep it in a colander to drain all the excess water and salt till the paste is being ground.
Let's grind the paste 

Grind all the ingredients mentioned above to a fine paste in small blender, without using any water. If necessary just add a teaspoon or so of water or better still add oil. 
 Apply the paste to fish inside out well ( see pic).  Place slit green  and red chilly  and in each fish . Keep this in the refrigerator to marinate for at least 30 minutes to an hour.
As you can see in the pic the paste has nicely set on to the fish, so it's necessary to keep it to marinate in the refrigerator.
Take a two big pieces of parchment paper and place few slices of lime and tomato roundels. 
Then the fish, again top it with lime and tomatoes slices, whole mushrooms, seal the packet ( for details check this post Mediterranean Fish En Papillote).
Bake in a preheated oven at 180 degrees, 20 to 25 minutes. 
I, used the air fryer and baked single packet at a time, since the oven was not working it took around 15 to 18 minutes for each to be baked. After 8 minutes I turned the packet and baked again for another 8 to 9 minutes. Let is rest in the air fyer till it cools a little then gently lift it on to serving plate and Enjoy. 
This we had as a meal, it was so filling and delicious.

Labels :  Air Fryer, Continental Cuisine, Healthy,Baked, Fish Friday, Seafood/Fish, Spiced Fish En Papillote, Parchment paper, Whole Pomfret Fish, Oil Free, Indian, Main course

Continue Reading
6 comments
Share:

Pretzel Dogs #Breadbakers


For Bread Bakers this month our Host by Stacy Livingston Rushton, choose the theme "Pretzels".  Thank you Stacy for hosting this month's event.


Pretzel Dogs are so easy and quick to make.  Used my earlier Pretzel dough recipe and halved it. The only difference is that this time used milk and fresh yeast. They make a perfect brunch or an evening meal. You can enjoy them with any sauce of your liking. 
I enjoyed them with Hot Sriracha Sauce. This was my Sunday's  dinner.  

Make 7 Pretzel Dogs  

Ingredients  
1/2  Cup Milk
1.3/4 Cups All-Purpose Flour
1/2 Teaspoon Salt
1 Teaspoon Sugar
1 Teaspoon Fresh Yeast
Extra Warm water if required
Coarse Salt for Sprinkling - Optional
Melted Butter for brushing
5  Pork Frankfurters

2 Tablespoons Baking Soda

Method
Pat dry the hot dogs with a kitchen towel. Keep aside

Place all ingredients in a bowl and mix till everything until well-combined. Knead the dough for 10 minutes, until it’s soft, smooth. Oil a bowl and place the dough (so it doesn't stick),cover with a cling film and allow it to rest till it doubles in volume.

While the dough is resting, prepare the “Baking Soda solution” mix 1 cup boiling water with 2 tablespoons baking soda, stirring until the soda is totally dissolved. Set the mixture aside to cool to lukewarm.

After  the dough doubles in volume , transfer the dough to a lightly greased work surface.

Preheat your oven to 200 degrees . Prepare a baking sheet by spraying it with vegetable oil spray, or lining it with butter paper.

Divide the dough into eight equal pieces.  
Shape each piece into a long rope about 2 feet and then lightly flatten it then roll it around the hot dog. 
Let the beginning end be underneath the dough. Gently roll and see that it overlaps and continue till the other end. 
The end should stick to the bottom of the hot dog. They should look like mummies. Let them rest, covered, for 10 minutes.
Pour the baking soda - water solution into a square pan.
Working with a hot dog pretzel at a time, roll them in the baking soda-water solution. and place them back on to the baking sheet . 
This silicone sheet is 10 years old.

Sprinkle it with a pinch of coarse salt or pretzel salt . 
Since I, had only 5 Pork Frankfurters, made two small mini buns with the remaining dough. 
Bake the pretzels for 18 to 20 minutes, or until they’re golden brown at 200 degrees . 
When out of the oven brush them with melted butter on top and the sides.
Enjoy the pretzels warm .
Amazingly delicious and so easy to make! 

Dip them in ketchup, sriracha sauce, cream cheese dip or with just mustard sauce.
Click here for Hot Buttered Pretzels - Soft & Chewy

Labels:
Breads, Bread Bakers, Hot Dog, Pretzel Dogs, Continental Cuisine

Have a look at the recipes of our other baker's.


Authentic German Pretzels from Sara's Tasty Buds
Ballpark Pretzels from Karen's Kitchen Stories
Beer Pretzels from Passion Kneaded
Buttery Pretzels from Ambrosia
Cheddar Garlic Soft Pretzels from Palatable Pastime
Cheese Jalapeño Stuffed Pretzel Rolls from Herbivore Cucina
Cinnamon Sugar Pretzel Bites from Cook's Hideout
Cinnamon Sugar Soft Pretzels from Hostess At Heart
Double Soda Pretzels from Food Lust People Love
German Pretzel Rolls from All That's Left Are The Crumbs
Honey Mustard Snack Pretzels from Cindy's Recipes and Writings
Pretzel Dogs from Sneha's Recipe
Pretzel Sticks from A Day in the Life on the Farm
Saffron Pretzel Rolls from The Schizo Chef
Soft Whole Wheat Pretzels from What Smells So Good?
Sourdough Soft Pretzels from Baking Sense
Whole Wheat Pretzel Bites from I camp in my kitchen
BreadBakers

#BreadBakers is a group of bread loving bakers who get together once a month to bake bread with a common ingredient or theme. Follow our Pinterest board right here. Links are also updated each month on this home page.

We take turns hosting each month and choosing the theme/ingredient.

Continue Reading
7 comments
Share:

Cream Puffs With Ice Cream And Chocolate #BakingBloggers

Choux paste, is a paste made of flour, water, butter, and eggs — it's slightly thicker than a batter, but not quite as thick as a dough. It's pronounced "shoe pastry," although shoe has nothing to do with it. 

The paste is thick enough that it can be scooped or piped into almost any shape you can think of, from -  puffs to éclairs shells to thin straws. 

On its own without any filling or accompaniment -  Choux is pretty bland to  taste; it's rarely served on its own. Either other ingredients are added to the dough to make it more flavorful like the cheese or the baked puffs get filled with pastry cream, ice cream, lemon curd or another delicious filling. You make any savory filling too, it taste good. The remaining, we had next day filled with jam and that too tasted yum!

I love chocolate éclairs. Since, there was a tub of ice cream in the refrigerator, decide to make ice Cream and chocolate Puffs - which are ideal accompaniments. The only draw back is that when you fill them with ice cream they have to eaten immediately or else the ice cream will start to melt and they will soften. These best to eat - is the day  - they are baked.


Making the Choux Dough

Making the dough is a three-step process: First, the dough is made by adding flour to hot water and butter ; then the dough is cooked on the stove top for a few minutes to dry it out and cook the flour (which makes them taste better); and finally, the eggs are beaten into the dough in a mixer.

The second step is a tricky step - i. e. adding the eggs. Instead of adding all the eggs at once, or just following the recipe, it's important to only add as much egg as the dough will hold. If you add too many eggs, the dough will be too wet, the dough will smell eggy and then to pipe it, will be troublesome and the pastries will have trouble drying out in the oven.

So to avoid this whisk the eggs together — this helps them incorporate more easily and evenly into the dough, and also makes it easier to add just half an egg if you need to. With the mixer running, add the eggs in two or three additions. Stop before the last addition goes in and check the dough — if it's ready, it will hold its shape when scooped, and look soft, creamy and will be  glossy . 

Baking the Choux Pastry
Baking the choux is also a three-step process. You start with the oven at high - i.e.  at 200 degrees temperature-  to help the pastries puff, then after 7 to 10 minutes when you see them puff up - lower the temperature to 180 slightly to help them cook and to give them some golden color, and finally when they are done / baked, you take them out poke the pastries and one end with a toothpick to make sure no steam is trapped inside and lower the oven temperature to 150 or 160 degrees a third time to dry the pastries out.

Once they're dried take out on a cooling rack and then let them cool completely before filling them.

Now let's begin the process.

Ingredients

125 Ml Water
35 Grams Butter
1/2 Teaspoon Salt
1 Teaspoon Sugar
70 Grams All purpose Flour
1/4 Teaspoon Vanilla Essence
2 Eggs

For filling

Melted Chocolate
Vanilla Ice Cream

Method 
I have seen many recipes without essence, but I, have added it just to avoid the eggy smell. So this is optional.
In a saucepan combine the butter, water, sugar, essence and salt. Place the saucepan over medium high heat and bring to a rolling boil. The butter should be completely melted by the time the water comes to a boil; if not, reduce the heat until the butter has melted to avoid too much water evaporating, then bring it back to a boil. 
Now take it off flame for a minute and add the flour all at once. Stir vigorously with a whisk to form a dough: Make sure all the flour is worked into the dough and no more dry flour remains. Once ready, the dough will resemble mashed potatoes. 
Now place the pan back over medium heat. Stir the dough, with a wooden spoon or spatula , mashing and flattening it against the sides and bottom of the pan and then gathering it up into a ball again — this dries out the dough and cooks the flour. Continue cooking the dough for 3 to 5 minutes. The dough is ready when it pulls away from the sides of the pan to form a ball, the surface looks shiny and glossy and it's thick enough that you can stand a spoon upright in the middle.

Cool the dough, when the dough still slightly warm with a electric hand blender or a stand mixer with a paddle attachment. 
Start pouring a little of the egg mix and whisk till the egg is fully incorporated and the then add again a little of the egg mix to the dough continue whisking in three separate additions. 
As each addition is worked in, the dough will at first become stringy and and look like curdled milk,but continue whisking then will form back together into a soft dough. Scrape down the sides of the bowl as needed between each addition.
Check the dough: After the third addition, the dough should be soft, creamy-colored, and very smooth. It should also hold its shape when scooped. If you scoop up a little bit with your spatula and let it slide back into the bowl.

Line a grease the baking sheet with parchment paper or foil. 
Transfer the dough to a piping bag with a plain nozzle ( which I did not have ) . I cut the point enough to pipe so that a thick batter is piped. 
Space the puffs slightly apart on the baking sheet. 

Bake for 10  minutes, then turn down the oven temperature as mentioned above. When the pastries look puffed, after 18 minutes or so - exact baking time will depend on the size and shape of your puffs. Bake until the puffs are slightly puffed, golden-brown in color, and dry to the touch. They will detach easily from the parchment and feel hollow and light when you pick them up. 
Then take them out and poke a tooth pick at one end and lower the heat to continue baking. Bake another 5 to 7 minutes or till the puffs  are dried out. If you break one of the puffs open, it should not be wet or eggy on the inside; bake a few more minutes as needed.

Transfer the puffs to a cooling rack.   Cool the puffs completely.   Split each puff in half and arrange them on a plate.

To Serve 
Melt  the chocolate in a double boiler or a microwave.

Place a small scoop of ice cream in the bottom half of each puffs and top with the lid. Drizzle melted chocolate on them.
Enjoy them immediately.. yum yum!

Labels :  Choux Pastry, Cream Puffs, Ice Cream, Chocolate, Baking Bloggers, Baked, Breads, Continental Cuisine


Our theme for BakingBloggers this month is Choux Pastry. Check the blogs of our other baker's :


Boston Cream Puffs by Cookaholic Wife
Burnt Caramel Croquembouche by Culinary Adventures with Camilla
Cannoli Cream Puffs by The RedHead Baker
Cream Puffs with Ice Cream and Chocolate by Sneha’s Recipe
Double Chocolate Cream Puffs by Cindy’s Recipes and Writings
Gougères – French Cheese Puffs by Karen’s Kitchen Stories
Ham Salad Pate a Choux by A Day in the Life on the Farm
Hot Smoked Salmon Choux Bites by Food Lust People Love
Strawberry Cream Puffs by Palatable Pastime

Continue Reading
5 comments
Share: