Vegetable Tahiri And Raita With a Twist#FantasticalFoodFight

Tahiri is a rice  is cooked without meat. Rice and vegetables are cooked together. Potatoes, pea and carrots are a must as vegetables in Tahiri . In Kashmir, Tahiri is served on street carts.
This recipe is made in the pressure cooker, so quick and easy that it takes less than 30 minutes from start to finish.
Serves 5 
Ingredients 
2 Cups Rice
1 Large Potato - cut into big cubes
2 Carrots - cut into big cubes
1/2 Cup Peas
1/2 Cup Oil
1 Cup Onion - sliced
1.1/2 Teaspoon Salt
1 Cup Yogurt - beaten
1/2 Teaspoon Turmeric
1 Teaspoon Chilly powder
1 Teaspoon Garlic paste
2 Green chilies
2 Tomatoes - cut in big cubes
Whole spices

4 Cloves
2 Sticks Cinnamon
8 Peppercorns
2 Green Cardamons
1 Black Cardamon
3 Cups Hot Water

For the Raita With a Twist
2 Cups Thick Yogurt - beaten
2 Cucumbers - finely chopped
1/2 Teaspoon Pizza seasonings
1 Tablespoon Coriander leaves - finely chopped

Method

Wash and soaked for 10  minutes.
In the mean time chop all the veggies required.
Heat oil in a pressure pan, fry onion light golden brown , add garlic paste with all the spices, fry well. Add in potatoes, carrot and peas. Fry for 2 minutes on medium high flame. Add yogurt and keep stirring till well incorporated. Then add rice and stir lightly. Add hot water and place  whole green chilies, tomatoes on top ( do not stir). Cover and bring it to a rolling boil.  Then cover the pressure pan with the lid,  cook on high flame for two whistles only.  Let the cooker cool down a little. 
Open the cooker and lightly  fluff the rice with fork and serve hot.
For the Raita With a Twist 
Mix the ingredients for the raita and serve with steaming hot Tahiri. Enjoy.
Labels: Rice, Vegetarian, Raita, Salads, Carrot, Potato, Pressure Cooker, 30 Minutes Meals, Fantastical Food Fight, Main course, Kashmir
You can learn more about our group and how to join in the fun over at this site.


#FantasticalFoodFight

Be sure to check out the other Fantastical "food fight" recipes this month !
>
You are invited to the Inlinkz link party!
Click here to enter
<
Continue Reading
3 comments
Share:

Cream of Onion And Orange Soup#SoupSwappers

This Cream of Onion And Orange Soup is so flavorful and so refreshing you will love it. The zest of the orange renders a beautiful aroma to this soup. Must try this.  

For Soup Swappers this month the theme is " Refreshing Fruit Soups" our host is April Tuell.

Ingredients
2 Tablespoons Butter
2 Medium Onion  - chopped
2 Medium Potatoes  -  sliced

½  Cup Cream
Cup Milk
3 Cups 
Water
1 Vegetable stock cube
A zest of One Orange
Salt to taste
Tablespoon Corn flour 
Method
Finely chop the onions, soak it  in water for 2 -3 minutes then wash it in fresh water to take out the strong flavor. Drain and keep aside.
In a pot add butter and when it melts, add the  onions in the pan and cook them for 3 - 4 minutes on low heat with pinch of salt.  Add water and  potatoes cool till the potatoes are done.   When done cool this mixture and then blend it in the  food processor , along with the milk  into a fine paste
 Return the mixture back to the pot and add a stock cube and cream, mix well.  Add the orange rind and cook for another 2 - 3 minutes.
Mix the corn flour in ¼ water, add to the soup, keep stirring it it comes to boil and thickens. 
Serve hot.. Enjoy this flavorful soup.
Labels : Soup, Fruit Soup, Orange, Onion, Vegetarian, Soup Swappers, Healthy 

Check out the Refreshing Fruit Soups other bloggers made for August 2019!

Chilled Tomato Peach Soup by Home Sweet Homestead
Chilled Golden Tomato Soup with Corn, Cherry Tomatoes, and Herbs by Karen's Kitchen Stories
Spiced Up Cantaloupe Soup by Sid's Sea Palm Cooking
Watermelon Soup by A Day in the Life on the Farm
Cream of Onion And Orange Soup by Sneha's Recipe

Continue Reading
3 comments
Share:

Salmon Katsu For Two With Tonkatsu Sauce#FishFriday

For this month Fish Friday we are asked to make a Japanese dish. Today, I am stepping out totally from my comfort zone and trying my hand at a famous Japanese  dish called Katsu,  Katsu also means “to win.”
Katsu is a fried cutlet where the Japanese always use Panko breadcrumbs as opposed to ordinary bread crumbs which provide a crispier texture. The Panko crumbs give an amazing texture to the Katsu. 

Ingredients 

200 Grams Salmon Fillets- cut into long thick fingers
Salt to taste
1/2 Teaspoon Black pepper powder
1 Tablespoons All Purpose Flour
1 Egg - lightly beaten
Panko Bread crumbs as required
Vegetable oil as required for frying
Homemade Tonkatsu sauce 
2 Tablespoons Worcestershire sauce
1 Tablespoon Ketchup
1 Tablespoon Honey

Method 

In a bowl add a tablespoon of egg, salt and pepper and apply it on the salmon on both sides and and marinate it for at least 15 minutes .
In a bowl beat the remaining egg lightly. Place the panko bread crumbs in a zip lock bag .
Then dust each salmon piece with an even coating of flour. Then dip the salmon pieces in the egg and coat evenly and then transfer it to the panko bag and shake it well and press it between your palms so the salmon is evenly coated in breadcrumbs. Let these rest in the refrigerator for at least 15 minutes.
In the meantime, pour  vegetable oil to a heavy bottomed pan / pot and heat on medium high flame. Place a wire rack with 2  to 3 sheets of paper towels to drain the salmon katsu. Fry the salmon until golden brown (about 2 minutes) on full flame and then transfer to the prepared wire rack. 
Serve with tonkatsu sauce. 
Dip it and enjoy..
For the Tonkatsu sauce
Whisk all the ingredients together well and pour it into a serving bowl. Tonkatsu sauce is ready. The sauce has a sweet and tangy taste which you will love.
My Notes 
The key to making a great salmon katsu is to fry it at a higher temperature than you normally would for meat. The reason is, so that the hot oil browns the outside quickly before the fish has a chance to overcook. 
Labels :  Seafood/Fish, Japanese, Deep Fried, Panko Bread Crumbs,Tonkatsu, Jams & Sauces, Fish Friday, Homemade


For Fish Friday Foodies this month our host is Sue the theme is Japanese Fish and Seafood.
A Living Legend + Panko-Crusted Abalone Over Green Tea Soba Noodles from Culinary Adventures with Camilla
Grilled Salmon Packets from A Day in the Life on the Farm
Hibachi Shrimp with Yum Yum Sauce from Palatable Pastime
Salmon Katsu for Two with Tonkatsu Sauce from Sneha's Recipe
Temaki Sushi Hand Rolls from Sid's Sea Palm Cooking
Tuna Tataki from Caroline's Cooking
Yuzu Kosho Grilled Scallops with Onion Salad from Karen's Kitchen Stories

Continue Reading
2 comments
Share:

Mini Bundt Chocolate Chip Cookie#BundtBakers

These are so soft in the center and crisp outside.  Very delicious to have as a snack or perfect for a HI Tea Party. Thank you Felice from All That's Left Are The Crumbs, for choosing such a challenging theme, loved it.
Makes 6 mini bundts
Ingredients

50 Grams Butter , softened
60 Grams Brown sugar
30 Grams Caster Sugar
1 Large Egg
1/2 Teaspoon Vanilla essence
90 Grams All Purpose Flour
1/4 Teaspoon Baking soda
1/4 Teaspoon Salt
1/3 Cup Chocolate Chips
1/4 Cup Chopped Walnuts
For the Chocolate Frosting - A Small Batch Chocolate Frosting 

40 Grams Dark Chocolate - chopped
15 Grams Butter - unsalted
2 Tablespoons Heaped Icing Sugar - sieved
3 Teaspoons Milk


Method
Pre heat oven to 175 degrees C.
Mix together the butter and sugars in a mixing bowl. 

Add the egg and the vanilla and continue mixing until well combined.  Add in the flour, baking soda and salt to the bowl and stir until just combined.  Fold in the chocolate chips and chopped walnuts.  Cling wrap the dough and refrigerate for at least 30 minutes. 
Make equal balls of chilled cookie dough and press it into  the mini bundts.  Bake for 22 to 25 minutes or until top is golden and the edges of the cookie is set. 
Remove from the oven and place on a cooling rack 
to cool for 10 minutes 
See the soft texture inside the cookies and black diamonds/chocolate chips peeking out..yum..yum
For the Chocolate Frosting - A Small Batch Chocolate Frosting
In a sauce pan add the chopped chocolate and butter, melt it over a double boiler. When melted mix it well so that it is smooth and shiny. Let is cool completely, add in the icing sugar and whisk well till smooth and lump free, add in the milk a teaspoon at a time to make it a spreadable frosting. Spread it over the cooled cookies.  
Enjoy, my hubby loved these cookie bundts and frosting on it was yum.
Labels : Cookies, Biscuits & Cookies, Bundt Bakers, Chocolate Chip, Walnuts, Healthy, Bundt
Bundt Bakers August 2019
Cookies Reimagined as Bundt Cakes


#BundtBakers is a group of Bundt loving bakers who get together once a month to bake Bundts with a common ingredient or theme. You can see all our of lovely Bundts by following our Pinterest board. We take turns hosting each month and choosing the theme/ingredient. Updated links for all of our past events and more information about BundtBakers, can be found on our home page. If you are a food blogger and interested in joining in the Bundt Baking fun please send an email to Stacey at foodlustpeoplelove at gmail dot com. Our theme this month is Cookies Reimagined as Bundt Cakes and our host is Felice from All That's Left Are The Crumbs.
Apricot Pistachio Oatmeal Cookie Bundt from Sweet Sensations
Bundt Cookie Oatmeal and Blueberries from Patyco Candybar
Kingston Bundt Cake from All That's Left Are The Crumbs
Mini Bundt Chocolate Chip Cookie from Sneha's Recipe
Oreo Bundt Cake from Patty’s Cake
Snickerdoodle Bundt Cake from A Day in the Life on the Farm

Continue Reading
1 comment
Share:

Rajgira Roti#BreadBakers

Amarnath / Rajgira flour is gluten-free, so it is a little hard to work with. The rolling part is not as easy like our regular roti or chapati. It is a crumbly dough, hence, will not get the smooth edges. So, keep sealing the edges as you are rolling, just be light and gentle while rolling.
Makes 4 Rotis
Ingredients
2 Cups Rajgira /Amaranth Flour
1 Large Potato - boiled, peeled and mashed
1 Tablespoon Ghee
Water as required to make a soft dough
Sendha Namak/ Rock Salt to taste or Normal Salt

Method

In a large bowl add rajgira flour, salt, mashed potato, mix well. Add ghee and mix it, knead dough by adding water, till it comes together and forms a soft dough. Cover it and let it rest for 10 minutes. After 10 minutes, divide the dough into 4 equal portions and make smooth balls. 
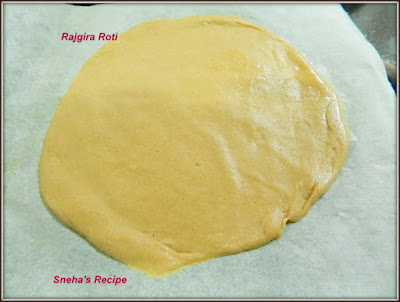
Now take parchment paper or plastic sheet on rolling board. Take one ball and flatten it out. 
Roll it very lightly and gently by dusting it with rajgira flour. 
Make slightly thin roti  
With slightly damp hands make it into a round circle 
and smoothen the edges. 
Heat the tawa or skillet on medium high heat. Gently lift parchment paper and put on hot tawa and peel off the paper. 
When once side is golden brown then, flip it. Cook for another few seconds, press gently using a spatula, till this side too is golden brown. 
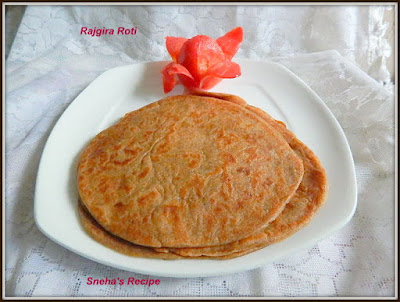
When done take it out from skillet and serve it hot. Repeat the same procedure for rest paratha. 
These have to be eaten hot, or else, they become chewy. 
Enjoy these Vrat Rajgira Rotis with Aloo Tamatar Jhol - No Onion No Garlic
Labels : Flatbread, Gluten free, Vrat, Amarnath, Rajgira, Bread, Bread Bakers, Healthy 
Check  the other Gluten Free Bread's baked

Aloo Nachini Roti from Sara's Tasty Buds
Banana, Coconut and Goji Berry Bread from All That's Left Are The Crumbs
Brazilian Cheese Bread from Karen's Kitchen Stories
Gluten Free English Muffins from A Messy Kitchen
Gluten Free Pizza Crust from What Smells So Good?
Masala Mixed Flour Thalipeeth from Sizzling Tastebuds
Methi Aloo Bajra Roti from Gayathri's Cook Spot
Rajgira Roti from Sneha's Recipe


#BreadBakers is a group of bread loving bakers who get together once a month to bake bread with a common ingredient or theme. You can see all of our lovely bread by following our Pinterest board right here. http://www.pinterest.com/flpl/bread-bakers/ Links are also updated after each event on the BreadBakers home page. http://www.foodlustpeoplelove.com/p/breadbakers.html We take turns hosting each month and choosing the theme/ingredient.

Continue Reading
2 comments
Share: