Vegan & Gluten Free Tomato Cauliflower Rice#Improv

What is Cauliflower Rice? It’s simply cauliflower pulsed in a food processor until it forms into granules that looks like rice grains. Does this taste as good as rice? Not,on its own, but it’s a great food from the point of diet, health and texture. It's  a delicious food for vegans and those with gluten allergy's. 
This has to be seasoned and cooked well a then only it will taste good when blended flavors and textures, it's delicious then eaten on it's own as you would enjoy a Rice Pulao/Pilaf.
This recipe is done from start to finish under 30 minutes.

You would also like to see this recipe make from cauliflower rice -  Baked Cauliflower Breadsticks.

Serves 3 - 4
Ingredients

2 Tablespoons Olive Oil
2 Medium Ripe Tomatoes  
1 Medium Onion - finely chopped
1 Green Chilly - finely chopped
½ Teaspoon Paprika powder to your taste
1 Tablespoons Parsley or Coriander Leaves - finely chopped
6 Cloves Garlic - finely chopped
1 Cup Water
2 Cups Riced Cauliflower
½ Teaspoon Sea Salt or to taste

Method
To Make the Cauliflower Rice 
Wash the cauliflower florets well. Dry them in a colander. Place the cauliflower florets in a food processor and pulse it until it resembles rice grains.
In a large pot bring water to rolling boil, add in the tomato and keep it for a minute. Remove and place them in cold water. Peel of the skin and de seed them. Chopperize the tomatoes along with the green chillies.
In large pan heat the oil add in the onions, sauté for a few minutes until translucent. Add the garlic and sauté until fragrant then add in the chopperized tomato mixture and paprika powder stir until mixed well. Sauté until all the tomato moisture evaporates and oil starts to leave the sides of the pan.
Add the cauliflower rice sauté it for 2 minutes, now add the water, salt, little of the coriander leaves give it a good mix. Increase the flame to medium high for 2 minutes or until the water comes to a boil, cover with a lid. Reduce the flame to medium low flame, cook for about 15 minutes stirring after every 2 minutes. After 12 to 15 minutes, remove the pan from heat and check the moisture/water content in the pan, if it all evaporated, switch off the flame. Let the cauliflower rice absorb moisture as it sits for about 7 - 10 minutes or until ready to serve.
Garnish with coriander leaves. Place the salad of tomato, onion and cucumber around the sides of the serving plate.
Enjoy this healthy, diet cauliflower rice hot.
Labels : Tomato, Cauliflower, Cauliflower Rice, Paprika, Main course, Vegan, Gluten free, Healthy, Improv Cooking Challenge

November Improv Cooking Challenge

Cauliflower & Paprika 

What is Cauliflower Rice? It’s simply cauliflower pulsed in a food processor until it forms into granules that looks like rice grains. Does this taste as good as rice? Not,on its own, but it’s a great food from the point of diet, health and texture. It's  a delicious food for vegans and those with gluten allergy's. This has to be seasoned and cooked well a then only it will taste good when blend...

Continue Reading
3 comments
Share:

Stuffed Potato Kulcha#BreadBakers

Warm melt-in-the mouth, pillow soft stuffed Kulcha, with potato filling. Makes a perfect brunch or dinner meal! A lighter healthier alternative to deep fried Puris or Bhatura, they are also a great option for lunch boxes, picnics or traveling as they can be enjoyed even at room temperature.
Makes 2 Kulchas
Ingredients  
2 Cups All Purpose Flour 
¾ Cup to 1 Cup Warm Milk
7 Grams Fresh Yeast
1½ Teaspoon Sugar
3/4  Teaspoon salt
1 Tablespoon Ghee or Olive Oil
For the Filling
2 Large Potatoes
2  Green Chillies - finely chopped
Salt to taste
1 Tablespoon Finely Chopped Coriander Leaves
For Topping
Finely Chopped Coriander Leaves as required
Sesame seeds as required
Butter to brush after it's out of the oven
Method
For the Filling
Boil the potatoes with turmeric. Cool them, peel and mash them well. Then add in the green chillies, salt and coriander leaves, mix it well. Divide into 2 portions, keep aside.
For the Dough
Add in the yeast, ½ cup milk and sugar in a big mixing bowl, mix it well and cover. Keep it aside for 10-12 minutes till it is frothy/bubbly.
Now add flour, salt to the bowl, keep adding warm milk a little at a time, till it forms a sticky dough.
Take this dough on to a work surface and keep folding and kneading it with a bench scrapper 5 to 7 minutes.
Grease your hands with a little ghee/oil on and start folding the dough till it becomes soft and smooth. Grease a bowl with oil and keep it till it double in volume. 
Now deflate the dough and divide it into two equal balls.
Slightly wet your hands, flatten one into a round disc on a plastic/silicone sheet. 
Place the filling in the center.
Start folding the sides such that the edges overlap each other, Make sure the filling stays inside.
Once all the sides have been pulled in, pinch the edges together to seal well. 
Again wet your hands and spread the ball evenly to flatten to about ½" thick. Lift the silicone sheet from one end and gently take the kulcha off.
Place it on the greased foiled lined tray. Again flatten it with wet, making sure it is even in thickness and also stretch it to make a nice round kulcha. 
Sprinkle chopped coriander leaves and black sesame seeds on top.
Lightly press it. Cover with a damp cloth and leave it proof for about 10-15 minutes.
Preheat the oven at 180°C for 15 minutes.
Bake 10 - 12 minutes, rotating the tray halfway through till they are light golden on top and sound hollow when tapped at the bottom. Brush a little butter, transfer the kulcha on to the wire rack to cool a little.
Enjoy them hot! 
This was our dinner, we had this with a bowl of soup.
Labels: Breads, Bread Bakers, Stuffed Bread, Brunch, Main course, Potato, Healthy

Welcome to Bread Bakers! This month, our theme is Stuffed Baked Breads and our host is Renu of Cook with Renu. 

#BreadBakers is a group of bread loving bakers who get together once a month to bake bread with a common ingredient or theme. You can see all our lovely bread by following our Pinterest board right here. Links are also updated after each event on the #BreadBakers home page. We take turns hosting each month and choosing the theme/ingredient
.

Warm melt-in-the mouth, pillow soft stuffed Kulcha, with potato filling. Makes a perfect brunch or dinner meal! A lighter healthier alternative to deep fried Puris or Bhatura, they are also a great option for lunch boxes, picnics or traveling as they can be enjoyed even at room temperature.Makes 2 KulchasIngredients  2 Cups All Purpose Flour ¾ Cup to 1 Cup Warm Milk7 Grams Fresh Yeast 1½ Teaspo...

Continue Reading
7 comments
Share:

Jamaican Saucy Jerk Chicken Wings With Homemade Jerk Seasonings#EattheWorld

These Jerk Chicken wings are spicy and sweet with an earthy flavor I, am sure you will enjoy. It's made with Homemade Jerk Seasonings which is preservative free an easy to make with all spices that are in your kitchen pantry. I served this rice with Jerk Chicken Wings and this was a perfect combo which makes for an excellent dinner or appetizer.
Made the Jerk Chicken wings a little saucy, served this with Coconut & Beans Rice which is a perfect combo. But you can dry them up if you want to serve as an appetizer.
Ingredients
250 Grams Chicken Wings With Skin
2 Tablespoons Oil
Ingredients For Marination
Blend all the ingredients to gather to a fine paste
1 Spring onion - finely chopped
4 Cloves Chopped Garlic
1 Teaspoon Chopped Ginger
1 Tablespoon Ketchup
1 Tablespoon Soy sauce
1 Tablespoons Lemon juice
½ Teaspoon Salt or to taste
For the Homemade Jerk Seasoning
1 Tablespoon Garlic powder 
3 Teaspoons Cayenne Pepper powder
2 Teaspoons Onion powder
2 Teaspoons Dried Thyme
2 Teaspoons Dried Parsley
2 Teaspoons Brown or White Sugar
2 Teaspoons Salt
1 Teaspoon Paprika powder
1 Teaspoons All Spice /Garam Masala Powder
½ Teaspoon Black pepper powder
½ Teaspoon Red Chilly Flakes
½ Teaspoon Nutmeg powder
¼ Teaspoon Cinnamon powder

Method
For the Homemade Jerk Seasoning
Combine all ingredients, in a small spice jar and pulse it once or twice till well mixed. 
Store in an airtight container.
For the Chicken Wings
In a blender add all the ingredients for the jerk chicken wings with a tablespoon heaped of jerk seasoning till blended. Rub this mix into the chicken wings and marinate the chicken for 4 -6 hours in the refrigerator.
Heat oil in a wok, add in the marinated chicken and fry for 2 minutes on high flame. Then reduce the flame to low. Cover and cook until tender, adding ½ cup water. When the wings are done and the gravy is thick/saucy switch off the flame. Serve this with a sprinkle chopped spring onions greens and dash of spice seasoning on top.
Serve immediately.
                             
Enjoyed this with Jamaican Coconut & Beans Rice

Labels: Jamaica, Jerk Seasonings, Homemade, Chicken, Chicken Wings, Main course, Eat the World, Masala

Join us as we Eat the World!!!

Each month Evelyne of CulturEatz invites us to visit a country and explore their foods. This month we are travelling to Jamaica.

Check out all the wonderful Jamaica recipes prepared by fellow Eat the World members and share with #eattheworld. Click here to find out how to join and have fun exploring a country a month in the kitchen with us! 

Pandemonium Noshery: Pumpkin Rice 
Culinary Adventures with Camilla: Jamaican Stew Peas 
Amy’s Cooking Adventures: Jamaican Chicken & Pumpkin Soup 
Palatable Pastime: Jamaican Jerk Chicken Burger 
A Day in the Life on the Farm: Banana Fritters 
Sugarlovespices: Jamaican Beef Patties 
Making Miracles: Jamaican Chicken Stew 

These Jerk Chicken wings are spicy and sweet with an earthy flavor I, am sure you will enjoy. It's made with Homemade Jerk Seasonings which is preservative free an easy to make with all spices that are in your kitchen pantry. I served this rice with Jerk Chicken Wings and this was a perfect combo which makes for an excellent dinner or appetizer. Made the Jerk Chicken wings a little saucy, served...

Continue Reading
6 comments
Share:

Bagels#BakingBloggers

These homemade bagels are so easy to make and they are deliciously chewy, which require only a few basic. The only difference is that no oil or butter is added to knead the dough.
Sending it to our Baking Bloggers event for this month's event and the theme is" Yeast Breads"
Ingredients
160 Ml Lukewarm Water
1 Tablespoon Heaped Caster Sugar
8 Grams Fresh Yeast
250 Grams All Purpose Flour
1 Teaspoon Sea Salt
For The Water Bath
1 Liter Water
2 Tablespoons Molasses Sugar/Un Refined Sugar
A Tablespoon of Soy Milk - for brushing

Method
Whisk the warm water, sugar and yeast together in the bowl, cover and allow to sit for 5 to minutes or till it's foamy.
In a food processor, add the flour and salt. Mix it on low speed for a minute. Add the water yeast mixture and run the food processor till it forms into a soft dough. Take this dough out onto a lightly floured surface, knead it for another 4-5 minutes.
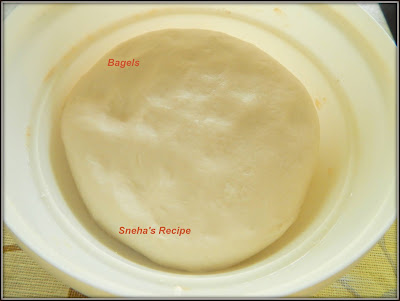
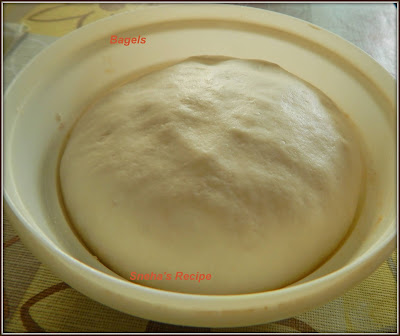
Place this dough in a greased a large bowl turning it to coat all sides in the oil. Cover the bowl with plastic wrap, or a clean kitchen towel. 
Allow the dough to rise at room temperature until double in size.
Line a baking sheets with aluminum foil or silicone baking mat.
Shape the bagels
When the dough is double in size, punch it down. Divide the dough into 6 equal pieces. (I weighed each ball was 70 grams one was 72 grams).
Roll each ball into a oval disc.
Roll it on one side
The other side
Pinch the edges properly
                             
Shape into a small long rope
Flatten one edge of the rope
Roll the rope into a circle and place the end into the flattened side and pinch the edges well.
Place each bagel on to cut parchment paper squares. 
Cover the shaped bagels with kitchen towel and rest for a 15 - 20 minutes till they rise, as you prepare the water bath.
Preheat oven to 200°C.
For the Water Bath
Fill a large, wide pot/pan with a liter of water. Add in the molasses sugar. Bring water to a simmer, then reduce heat to low. 
Drop bagels in, 2 or 3 at a time, making sure they have enough room to float around. 
Peel off the parchment paper gently. Cook the bagel for 1 minute on each side. Remove with a slotted spoon and place them on clean towel. 
When drained of all moisture then place them in the prepared tray.
Using a pastry brush, brush with soy milk on top and around the sides of each bagel. 
Bake for 20 - 22 minutes, rotating the pan halfway through.
Remove from the oven and allow bagels to cool on the baking sheets for 20 minutes, then transfer to a wire rack to cool completely.
They are ready to Enjoy!!
Slice, toast, top, whatever you want! Cover leftover bagels tightly and store at room temperature for a few days or in the refrigerator for up to 1 week.
Labels : Breads, Bagels, American, Yeasted, Baking Bloggers, Vegan, International Cuisine 
Baking Bloggers November 2020 - Yeast Breads

These homemade bagels are so easy to make and they are deliciously chewy, which require only a few basic. The only difference is that no oil or butter is added to knead the dough.Sending it to our Baking Bloggers event for this month's event and the theme is" Yeast Breads"Ingredients160 Ml Lukewarm Water 1 Tablespoon Heaped Caster Sugar 8 Grams Fresh Yeast 250 Grams All Purpose Flour 1 Teaspoon S...

Continue Reading
4 comments
Share: