Tomato Pappu / Tomato Dal - Andhra Style


This dal is nutritious and flavorful it's made from softened pigeon peas, sauteed with onion, tomato and  a blend of spices. Dal is an integral dish of every Indian kitchen. This is an Andhra vegetarian dish, also know as Tomato Pappu . Pappu in Telugu language is known as the dal.

Ingredients
1 Cup Tur Dal / Pigeon Peas
1/2 Teaspoon Cumin seeds
A Sprig Curry Leaves
1 Large Onion - finely chopped
8 Cloves Garlic  - lightly crushed
4 Green Chillies - seeded and slit
1 Teaspoon  Red Chilly powder
2  Tablespoons Oil
1 Tablespoon Butter
4 Big Tomatoes - chopped
1/4 Teaspoon Turmeric powder
1/2 Teaspoon Mustard seeds
1/2 Teaspoon  Salt or according to taste


For the Tempering 
1 Tablespoon Oil
1/2  Teaspoon Mustard seeds
1/2 Teaspoon Cumin seeds
A Sprig Curry Leaves
3 Dried Red Chillies
A pinch of Asafoetida

Coriander leaves chopped for garnishing

Method


Wash and soak the dal for at least an hour.
Then rinse the dal in fresh water. In a pressure cooker, add the dal and water an 
inch above the dal, bring it to a rolling boil,  remove. the scum that surfaces then close the pressure cooker with the lid and pressure cook for about 8 to 10 minutes or for 2 whistles. Let the cooker  cool down.


Meanwhile, heat oil in the pot/ kadai, add 1/2 teaspoon mustard seeds, cumin seeds and when they start to splutter, add the garlic crushed and saute it for a second only, add turmeric, curry leaves onion, green chillies and saute for a minute or till the onion is translucent. Add tomato, salt,  cook until the tomatoes become soft and mushy. Add the butter,  dal and 2 cups water or according to the consistency you require give it a quick stir. Reduce the flame to low and let it simmer for 10 minutes stirring in between.

For the tempering 


Heat a tablespoon of oil in pan, add mustard, cumin seeds, whole red chilly, curry leaves and asafoetida let it sizzle, then pour this over the dal.   Serve hot,   garnish with coriander leaves and enjoy with steamed rice or roti, chapatti, or naan. 

MMLLA- Blog event rundup


Labels : Vegetables, Tur Dal, Lentils, Healthy, Vegan

Continue Reading
1 comment
Share:

Green Chutney Stuffed Pomfret #Fish Friday Foodie


Pomfret is my favorite fish. I do not know why I like this fish not that it is more tastier than I other fish. But some how, mostly end my buying pomfret, Basa or Seer fish, may be becasue it has less thorns.  But,  my weakness is pomfret,  enjoy eating stuffed pomfret.  I,  stuff this fish in different masala and ways, even enjoy this fish steamed.  Remembering  the days when, I , was young every Good Friday my father used to go to Andheri fish market to buy big large pomfrets and Lobsters for us. We East Indians call pomfrets "Sarga " My mother used to stuff these pomfrets with this chutney for us. This my mother's recipe an traditional East Indian style of stuffing this fish. Try this and you too will enjoy it, will never forget the taste of this stuffed pomfret.

But over the years my father's thinking changed and no more do we eat fish on Good Friday, it became a vegetarian day for us. But those memories are still imprinted in my mind and now I, rarely get to see that size of pomfrets that my father use to bring in market.


For stuffing pomfret you can use either the big size ones or the palm size. This chutney will be enough to fill 2 palm size ones.

This goes to Fish Friday Foodies, this month I am  hosting this event.  Thank you Wendy for giving me this opportunity to host this event,

Ingredients
2 Palm Size Pomfrets
1/4 Teaspoon Turmeric powder
1 Teaspoon Lemon Juice
1/2 Teaspoon Salt

For the Green Chutney - Grind to a paste

1 Cup Packed Coriander Leaves with the Tender stalks
5 Green Chillies or according to your taste
1/2 Cup Freshly grated Coconut
4  Cloves Garlic
1 Small Onion
1 Teaspoon Cumin seeds
1 Tablespoon Lemon juice
Salt to taste


Oil for frying
Rice flour for coating - optional

Method

For the pomfret

With  the back of a knife, lightly scrape  pomfret remove the scales present  ,  cut off the fins and tail.

  
Cut the fish near its stomach area and clean the inside portion very thoroughly.  Holding the head of the pomfret slit it horizontal from the head to the tail not separating it on one side.  Once this is done clean the unwanted stuff from inside and with the point of the knife remove any black stuff from the stomach part ( this even the fishmonger will slit, clean and give you, if you request ). 


Wash the Pomfret and tilt it, so the water drains off. 


Apply salt, turmeric and lime , on both sides and inside too, keep aside for 10 minutes. 

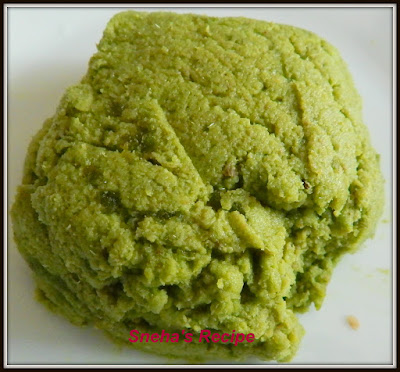
Grind the chutney to a paste in a mixer try not to add too much water if needed add a little. Keep aside.


Take a pan, add a teaspoon of oil,  pour the chutney to thicken it up for a while (see pic) , when it starts getting thick and water is reduced. Keep the flame on low and stirring off and on. Take off flame and allow to cool completely.


Fill the chutney into the pomfret. If you feel that you will not be able to handle the stuff pomfret while frying then tie with a string to hold the masala ( use stitching thread ). Apply a little chutney on the pomfret too.   Keep this stuffed pomfret in the fridge for 30 minutes to an hour.


Take a big non stick pan pour in oil enough for frying and heat it on medium low flame.


Spread the rice flour in a big plate and turn the fish into it on both sides so that it is coated with the flour. Place  it carefully in the pan and fry on one side then flip and fry the other side. Tilt the pan for the sides to cook so you get an even colour for the fish on all sides. When done place it  on kitchen paper towel for the excess oil to drain.  Before serving cut off the string carefully when a slightly cooled. 


Serve hot, garnish with onion rings, slices of tomato and lime... cut a piece and enjoy...

My Notes

Coating it with rice flour gives  it a crisp texture..


Lables :  East Indian, Fish Friday, Stuffed Fish, Chutney, Seafood/Fish, Whole Pomfret, Pan Fried

Continue Reading
3 comments
Share:

TAHDIG WITH POTATO - CRUSTY RICE WITH POTATO


Bahrain officially  called as the Kingdom of Bahrain,  is an island country situated near the western shores of the Persian Gulf in the Middle East. Bahrain has more expats which are outnumbering the locals. Bahrain is modern and cosmopolitan. Hence the cuisine of Baharain is mix of Persian, Arabic and Asian. This month in Mena Cooking club we are exploring the cuisine of Baharain. I choose to make a savory and a sweet dish.

Tahdeek or TAHDIG is an Iranian / Persian traditional dish, which is a crispy / crusty rice. Tah means "bottom" + DÄ«g means "pot" There are many different version of making this recipe. Some make with yogurt and saffron or with lavash bread or with potato. Here I, have made this recipe, with an addition of my own by adding a pinch of spices to the traditional Tahdig which is actually without any spices.

Ingredients

1  Large Potato
1 Cup Basmati Rice
1/8 Teaspoon  Saffron

2 Tablespoons Water 
1 Clove Garlic
1/8 Teaspoon Black Pepper Powder
1/8 Teaspoon Chilly Flakes
1 Tablespoon Oil
1 Tablespoon Butter
Salt to Taste

Method


Slice potatoes as evenly as possible in about 1/4″ rounds and immerse them in  water with a pinch of salt till further use.


Mix the saffron in 2 tablespoons warm water and a pinch of salt, keep aside.


In the meantime let's cook the rice.  Boil the rice in 4 -5 cups water and a teaspoon of salt, cook the rice till done.  Strain the rice and cool it.  


In a flat round pot add oil and a teaspoon of butter and grease it well.   Then pour the saffron water.


Arrange the slices of potato as seen in the pic.  


Grate the clove of garlic, sprinkle a pinch of chilly flakes and pepper powder.  


Now place the rice on top of the potato and lighlty press.  


Again sprinkle a pinch of black pepper powder and chilly flakes, dot it with remaing butter.  Cover the pot with a aluminum foil and keep it on high flame for 5 to 7 minutes.  Then reduce the flame to very low and let it cook for an hour. 


After an hour switch of the flame and let it cool.  When you open the pot, you will see that it has left the sides that means it's done perfectly


Overturn it on to a plate and enjoy .... yum ... 
tahdig... crusty potatoes and soft rice ... hmmmm delicious. 


Labels : Rice, Potato, Bahrain, Mena Cooking Club, Continental Cuisine

Continue Reading
No comments
Share:

KHABEES AL NIKHI


Khabees is a traditional sweet found throughout the Arabic country that is made with different types flours  like :- all purpose flour, semolina , chickpea flour and brown flour. When Chickpea is used it's called as Khabees Al Nikhi. Khabees is made with all purpose flour or brown flour and   Al Khabees is made with semolina flour.
  This is a simple and easy sweet from Bahrain.   


I took  a dozen of these for my friends, they were so thrilled and enjoyed it... for them these were tasty and healthy balls. My hubby too liked these dates balls though he is not a fan of dates.  


Makes around 18 to 20
Ingredients
2 Cups Chickpea flour  / Besan
5 Tablespoons Level Tea Sugar
1/2 Cup Water
1/3 Cup  Butter
1  Teaspoon C
ardamom powder
2 Tablespoon Rose water
16  Dates -  deseeded and 
chopped
1/3 - 1/2  Cup  Sesame seeds - 
toasted

Method


In a microwave proof plate add chickpea flour and microwave on high for 2 minutes.  Mix it well,   then microwave for a minute and again mix it well, like wise keep it for  another 3 after every minutes mix it well.  If you find that the flour is not roasted and not giving a nutty flavor then microwave it for every 30 seconds and give it a mix.  This is what I did for another 2 minutes pausing every 30 seconds and mix it well.   It took about 7  minutes to roast the flour in the microwave. 


After the chickpea flour is nicely roasted add the butter and stir it when its hot.  Then again microwave it for 2 minutes, pausing every 15  seconds to give it a quick stir. When its hot add the dates and stir it well.  The dates will soften.   Keep this aside.

 In a saucepan, add sugar and water. Bring to a rolling boil, then take it off flame. Add cardamom powder, and rose water mix well.  

Add the sugar water to the chickpea flour until a soft dough has formed. I used all the sugar water. 

Divide the dough into 
marble size balls, then roll  each in sesame seeds. Place on the baking sheet and bake for 10 minutes in a  preheated oven at 150 degrees.


Look at these pretty balls studded with small white pearls... hmm... beauties..  


These have a natural color because I, used medjool dates. 

My Notes

The flour is traditionally  roasted in a pan and butter is added to sugar water.  But I used the microwave and added the butter to the flour and roasted it in butter for 2 to 3 minutes. 

I found that the microwave is quick and requires less effort and roasted  the flour  to perfection.   

When I was surfacing the net and watching videos they all followed the pan method.    They also kept the flour after adding the sugar water again in the oven to steam it.  This can all be eliminated if you use the microwave method.

Do not keep the sugar water boiling, since this not require any thread consistency.  Soon as it come to a boil, switch off the flame.


Labels :  Sweets & Desserts, Healthy, Mena Cooking Club, Bahrain, Continental Cuisine


Continue Reading
3 comments
Share:

LAL BHOPLYACHYA GHARGE / FRIED RED PUMPKIN PURIS #BREADBAKERS


Gharge is basically a sweet bread that has red pumpkin as one if its main ingredient.  Gharge is a very traditional recipe of Maharashtra which is made Red Pumpkin, in Marathi it's called Lal Bhopla.  For festivals and puja these puris are mostly prepared.  

These were on my to do list for a long time.  When the theme was given for this month, was very happy.  This was first thing that came to my mind... and here it is... Lal Bhoplyachya Gharge.   Red Pumpkin is cooked once a week in my house since hubby loves it.   Although  these puris  are loved by all they rarely prepared since these are  deep fried.   They have a sweet taste with an awesome flavor of fennel seeds, which are not added in the puris by us traditionally.  But I love playing with ingredients, this really worked and everyone enjoyed these puris.  Here is  my recipe ..

Ingredients


1 Cup  Lal Bhopla / Red Pumpkin -  cut into cubes

1/2 Cup 
Gul / Jaggery -  grated 
1/2 Teaspoon Cardamon powder
1 Teaspoon Fennels seeds - coarsely ground
1/2 Teaspoon Baking powder 
2 Cups Whole Wheat Flour
A Pinch Salt 
Oil as  required  to  deep fry


Method


Steam the pumpkin  without using water in a pan till done, take off flame,  when slightly cool  mash it to a smooth paste.

  
Mix the jaggery with the pumpkin well.  Leave aside for 10 to 15 minutes for the jaggery to dissolve. Do not add water.


When the jaggery has dissolved completely, add to it a pinch of salt and a tablespoon oil, fennel and cardamon powder,  mix well, then add baking powder and  wheat flour a little at a time, add in only as much as required to  make a slightly stiff dough. Let this dough rest covered for at least  half an hour.


Take a big ball of dough.  Oil the rolling board and roll it into a 1/4 inch thick chappati, ( do not use dry flour for rolling).  Take a round cookie cutter and cut into puris. Arrange them in a single layer. Like wise make all the  puris. 


Heat oil in a deep frying pan and deep fry each puri, till golden brown on both sides on medium high flame. 


Have these with a cup of tea for breakfast or as tiffin to your kids.   Enjoy  these soft, sweet and puffy puris.... 


Labels : Breads, Red Pumpkin, Festival Sweets, Bread Bakers, Kids delight, Vegan

Sending these to Bread Bakers September event wherein we had to use pumpkin or pumpkin spices in the bread. Host is: Kylee , thank you for hosting this event.

Bread Bakers is a group of bread loving bakers who get together once a month to bake bread with a common ingredient or theme. Follow our Pinterest board right here. Links are also updated each month on this home page. We take turns hosting each month and choosing the theme/ingredient.
See here what are  fellow bakers have baked this month.
Breads with Pumpkin/Pumpkin Spice

Continue Reading
15 comments
Share: